Foreward:
This came to my attention after a member on bimmerpost posted his concern about his belt tensioner jiggling prior to a track day. I took a look at mine and below is what I saw.

The tensioner is not suppose to “jiggle” like it does in the above video. It’s suppose to maintain a fair amount of pressure on the belt, the jiggling could jiggle enough to make the accesory belt fall off and/or rub against things it’s not suppose to as seen in this post.
This DIY is most likely covered by your warranty and or Certified Pre-Owned warranty but given I’d have to remove my tune and a bunch of parts to do that, I decided to do this one myself. One forum member claims his Service Adviser stated that the jiggle is totally normal and another stated they replaced his.
The install took me about 1 hour, taking photos and mess up included, without any of that, maybe 20 minutes?
Technical skill
Cost
Time commitment
PITA factor
Prerequisites:

Make sure you have the tools needed for the job:
- New tensioner: BMW Part #11-28-8-604-266 here at ECStuning (Always double check this against your specific vehicle/VIN)
- New Belt: Here or here on Amazon (not Prime)
- Vice grip pliers or just regular pliers might work as well
- Torque Wrench (Decent Tekton here)
- 3/8″ or 1/2″ long handle socket wrench
- T50 Torx here on Amazon or a 3/8″ allen socket or equivalent metric allen socket
- ETorx set (I bought this Lisle set, cheaper options are available on Amazon)
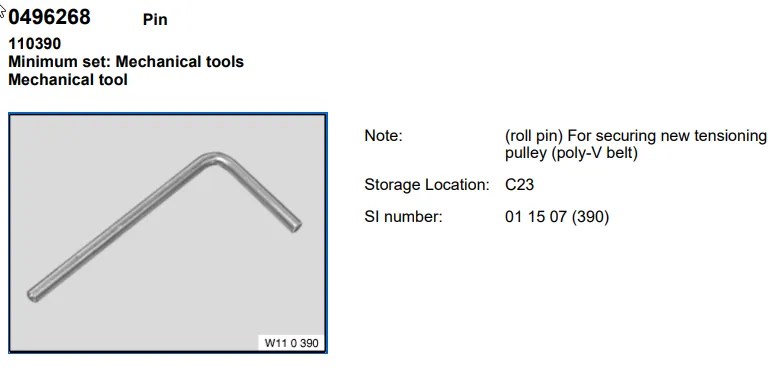
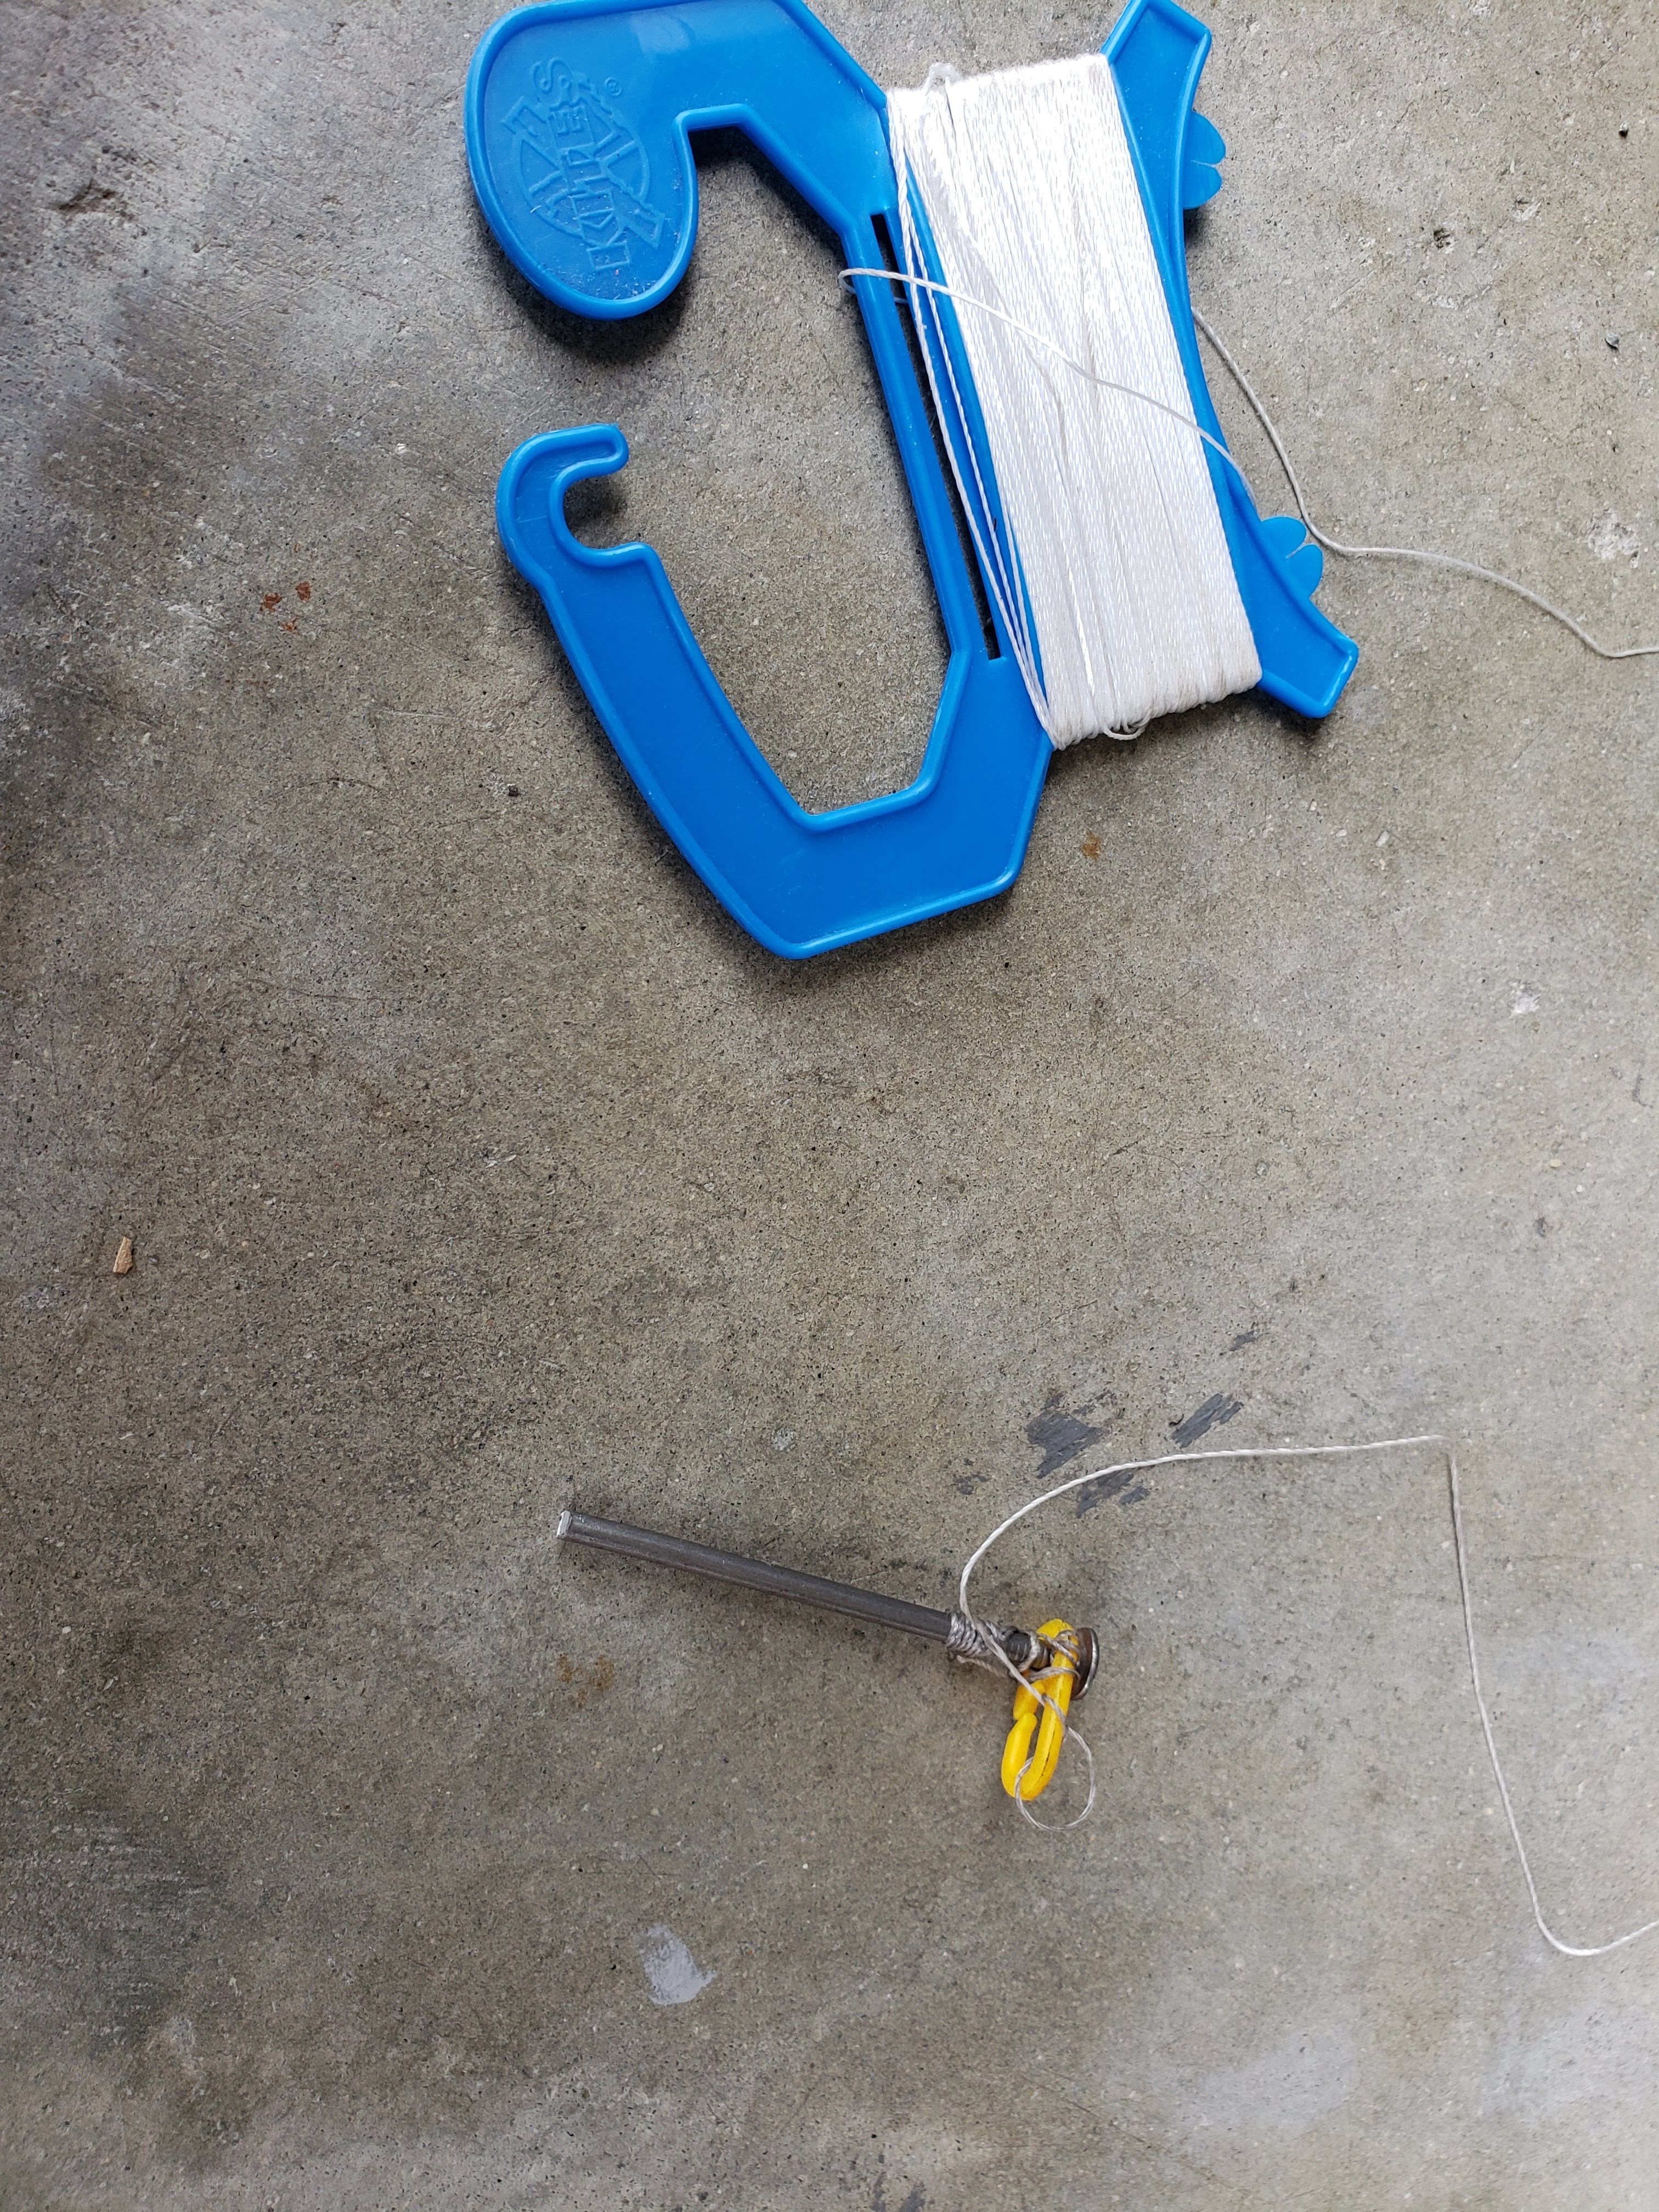
- Custom made BMW Tool (AKA a large nail)
Installation:
-
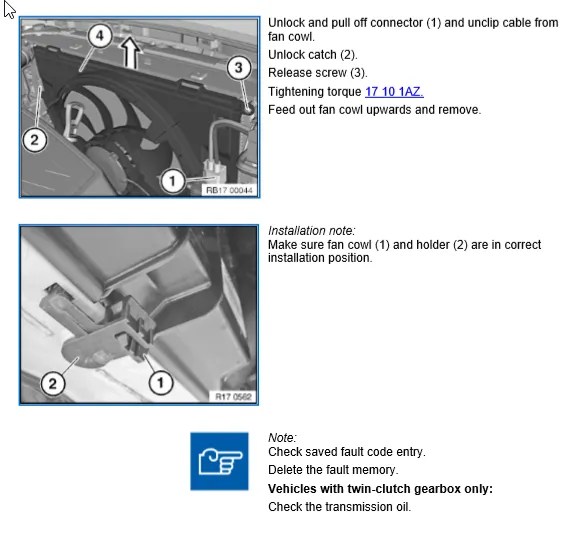
- Create a BMW Tool 110390 and name it something cool, I used a thick nail, with the pointy head snipped off, with some random string from one of my kids kite attached to it.
- The first nail I tried to use fell into the belly pan (I think that brings my total things lost to the belly pan to 6 now.)


badbread patented BMW Tool 5000©!
- The first nail I tried to use fell into the belly pan (I think that brings my total things lost to the belly pan to 6 now.)
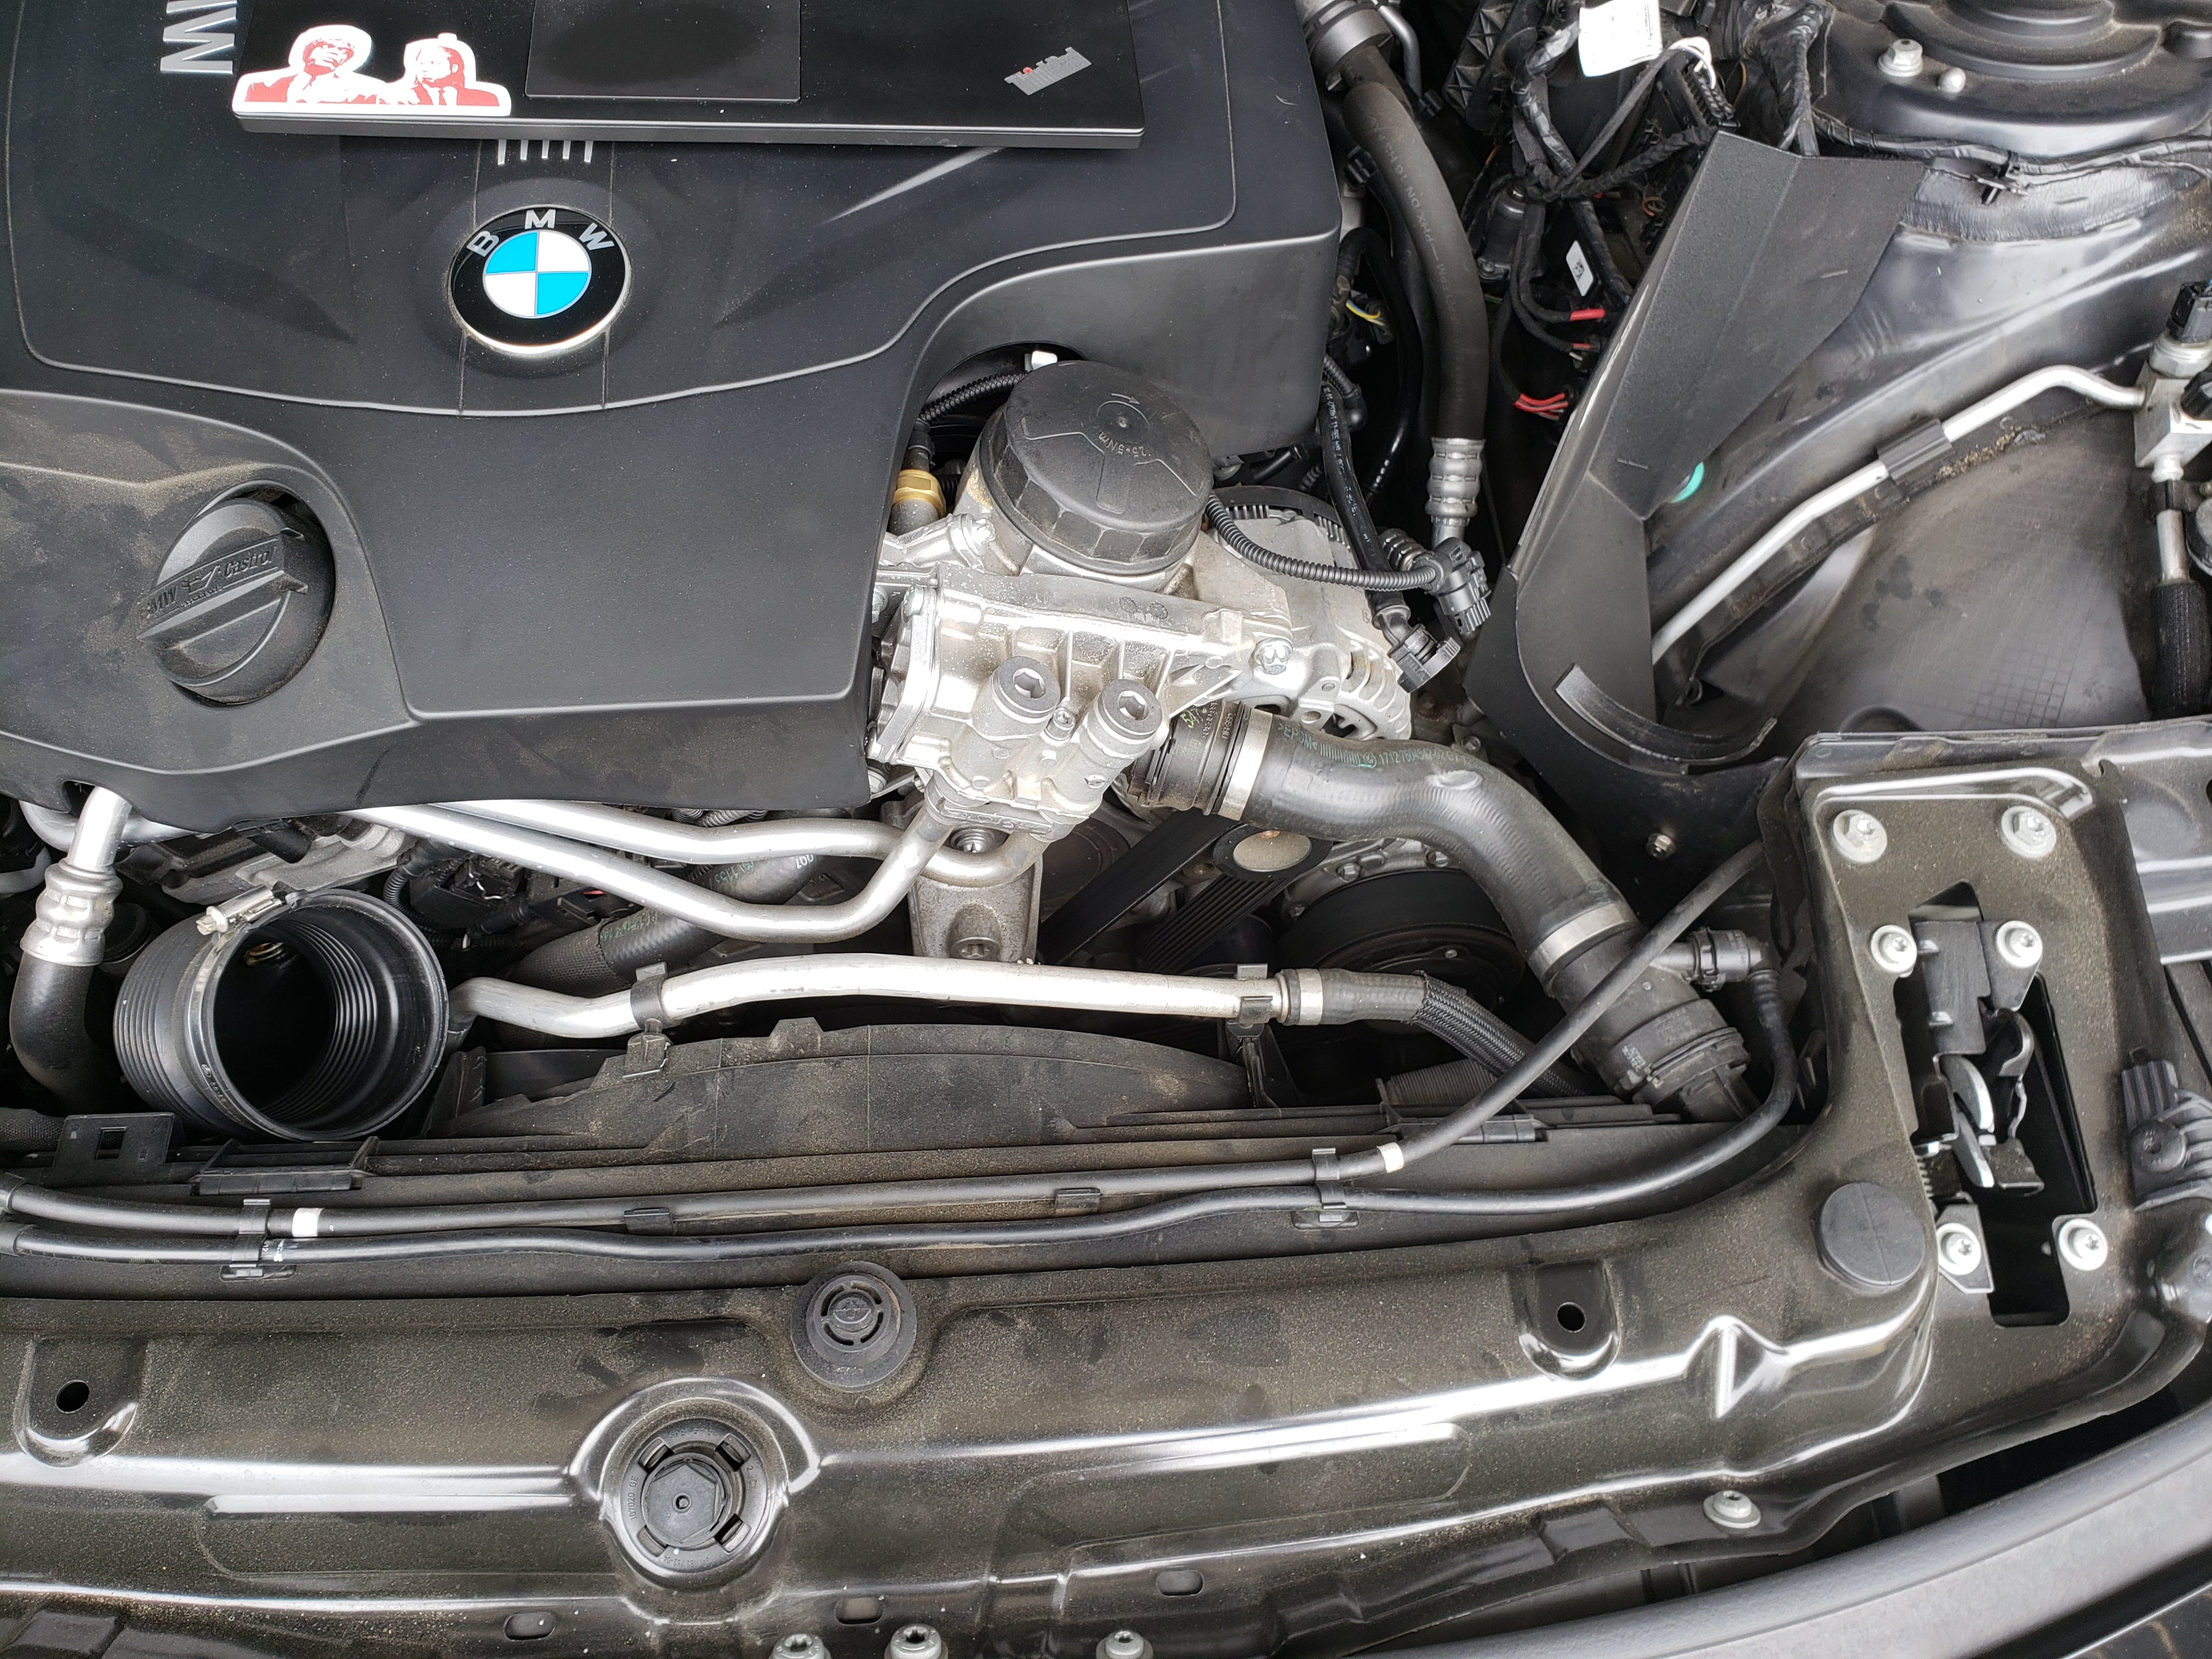
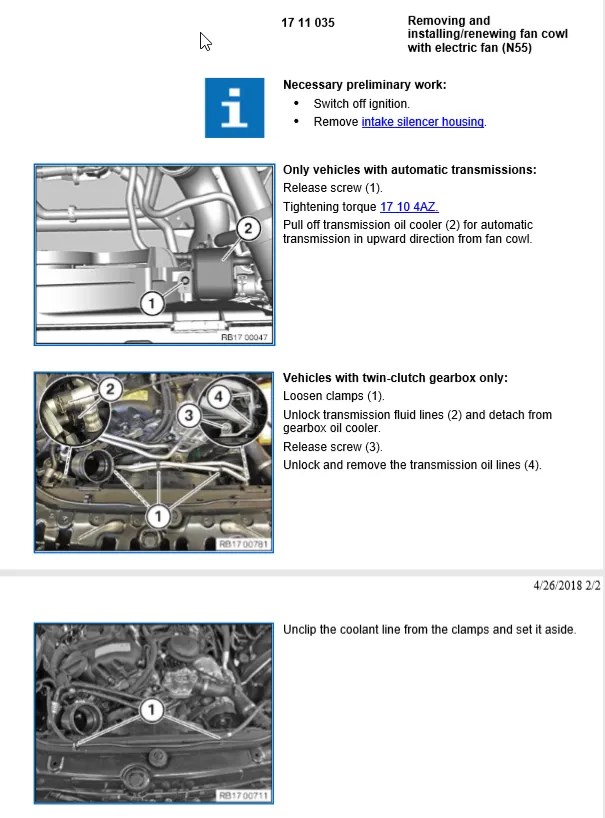
- I started by removing my air intake, there’s no way to do it with that in the way.
-
Pro-tip before removing the intake
Blow some canned air where the intake meets the flex tube, lots of crud gets lodged in there you don’t want falling into that tube
[collapse]

-
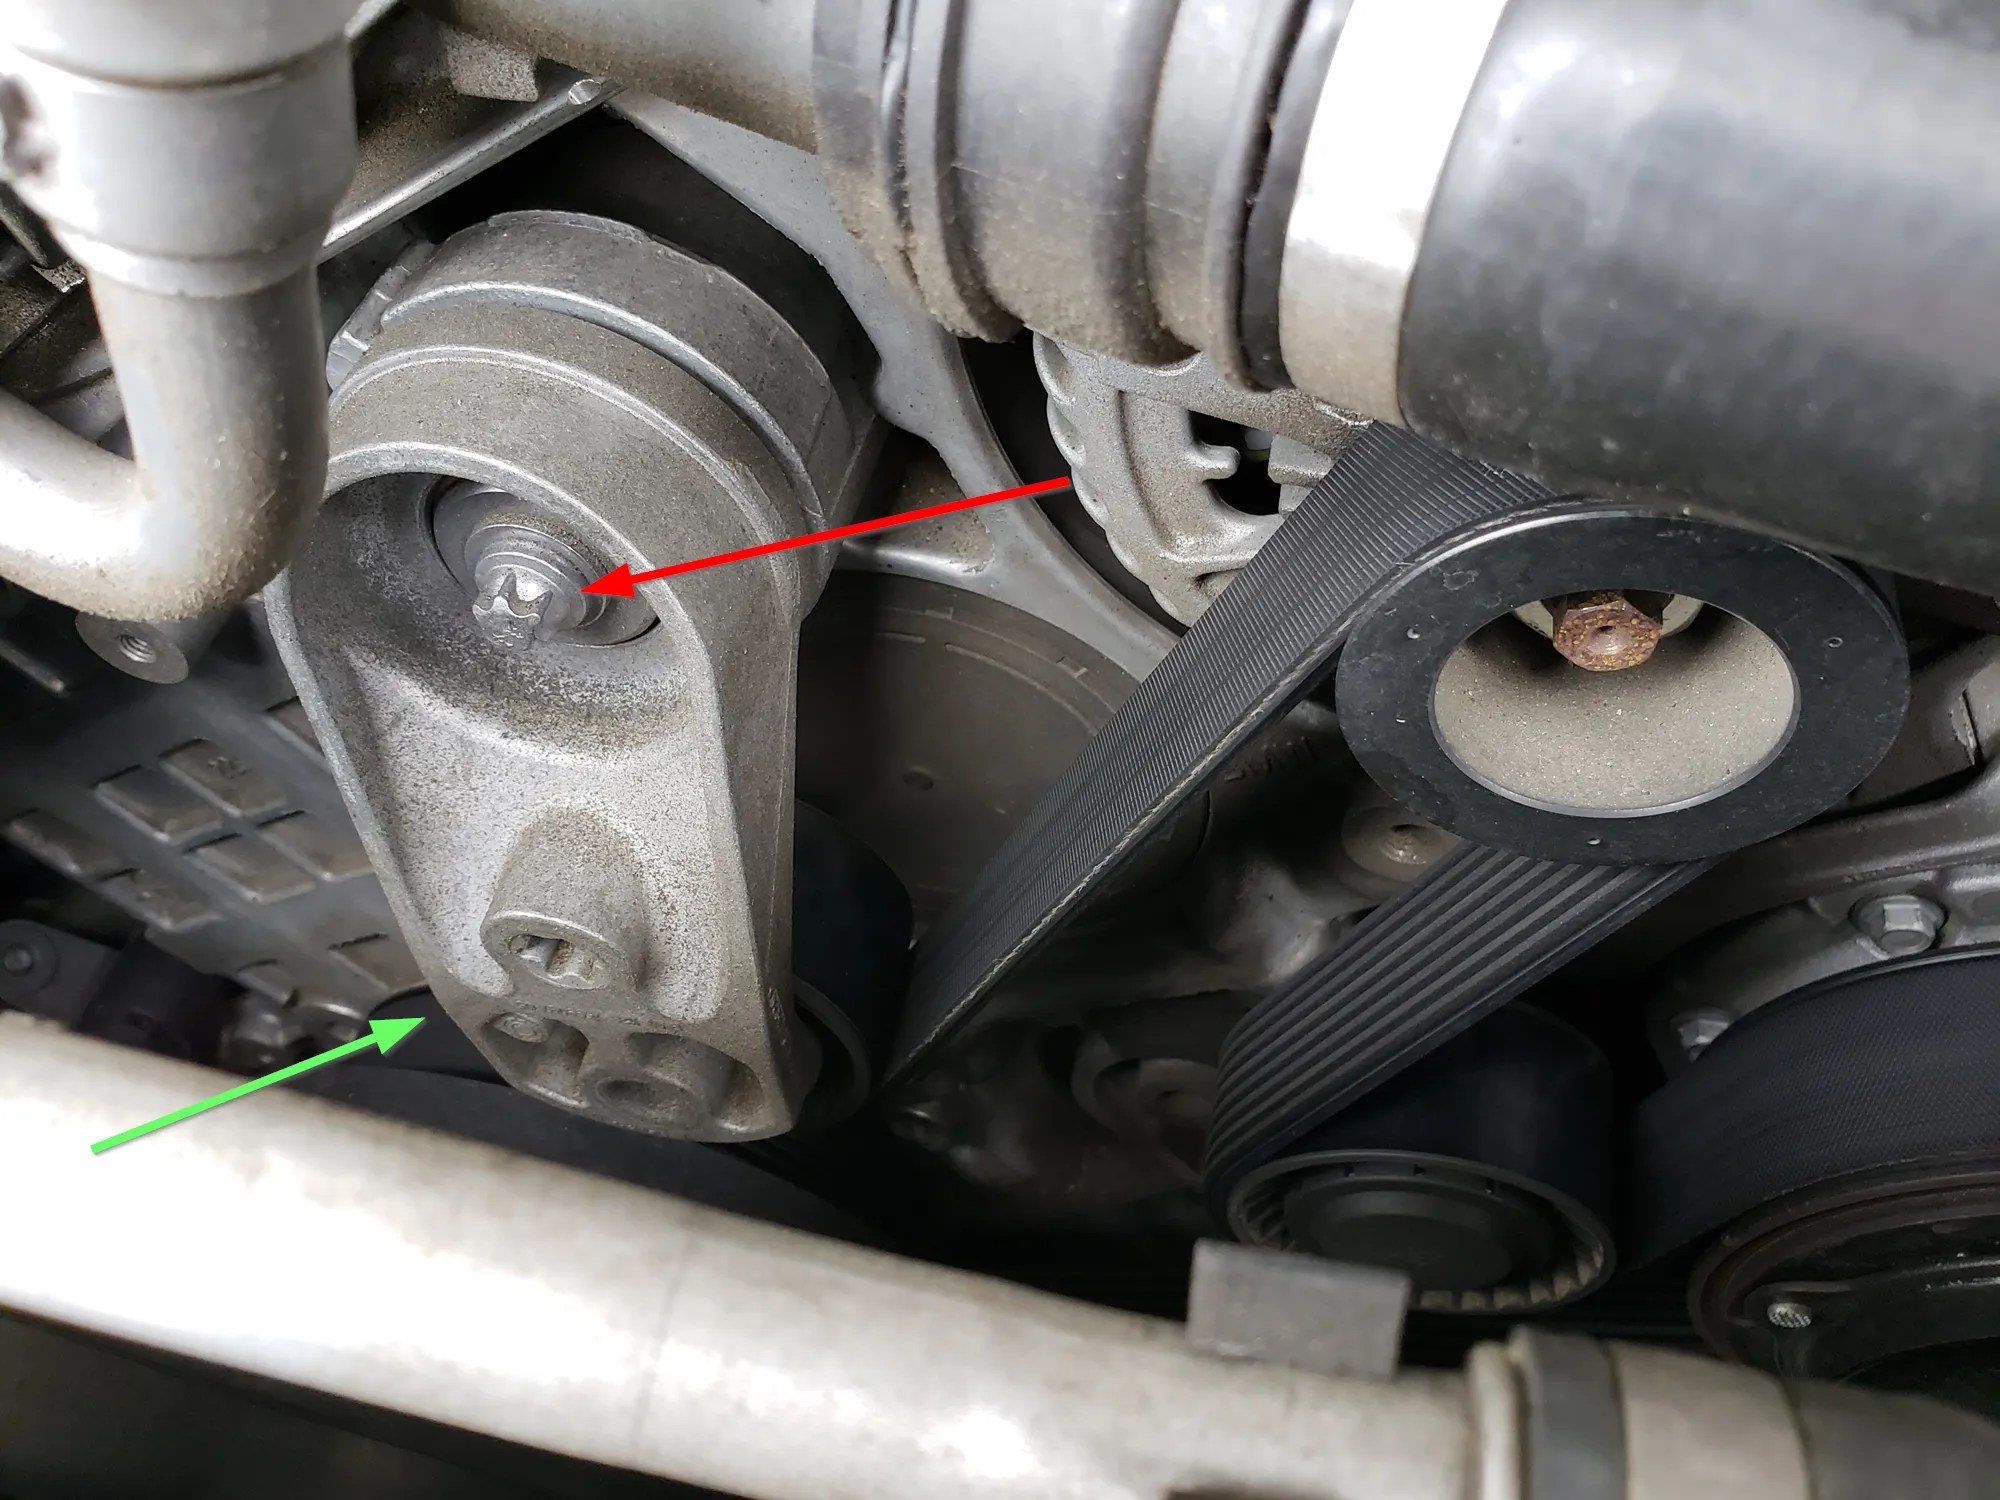
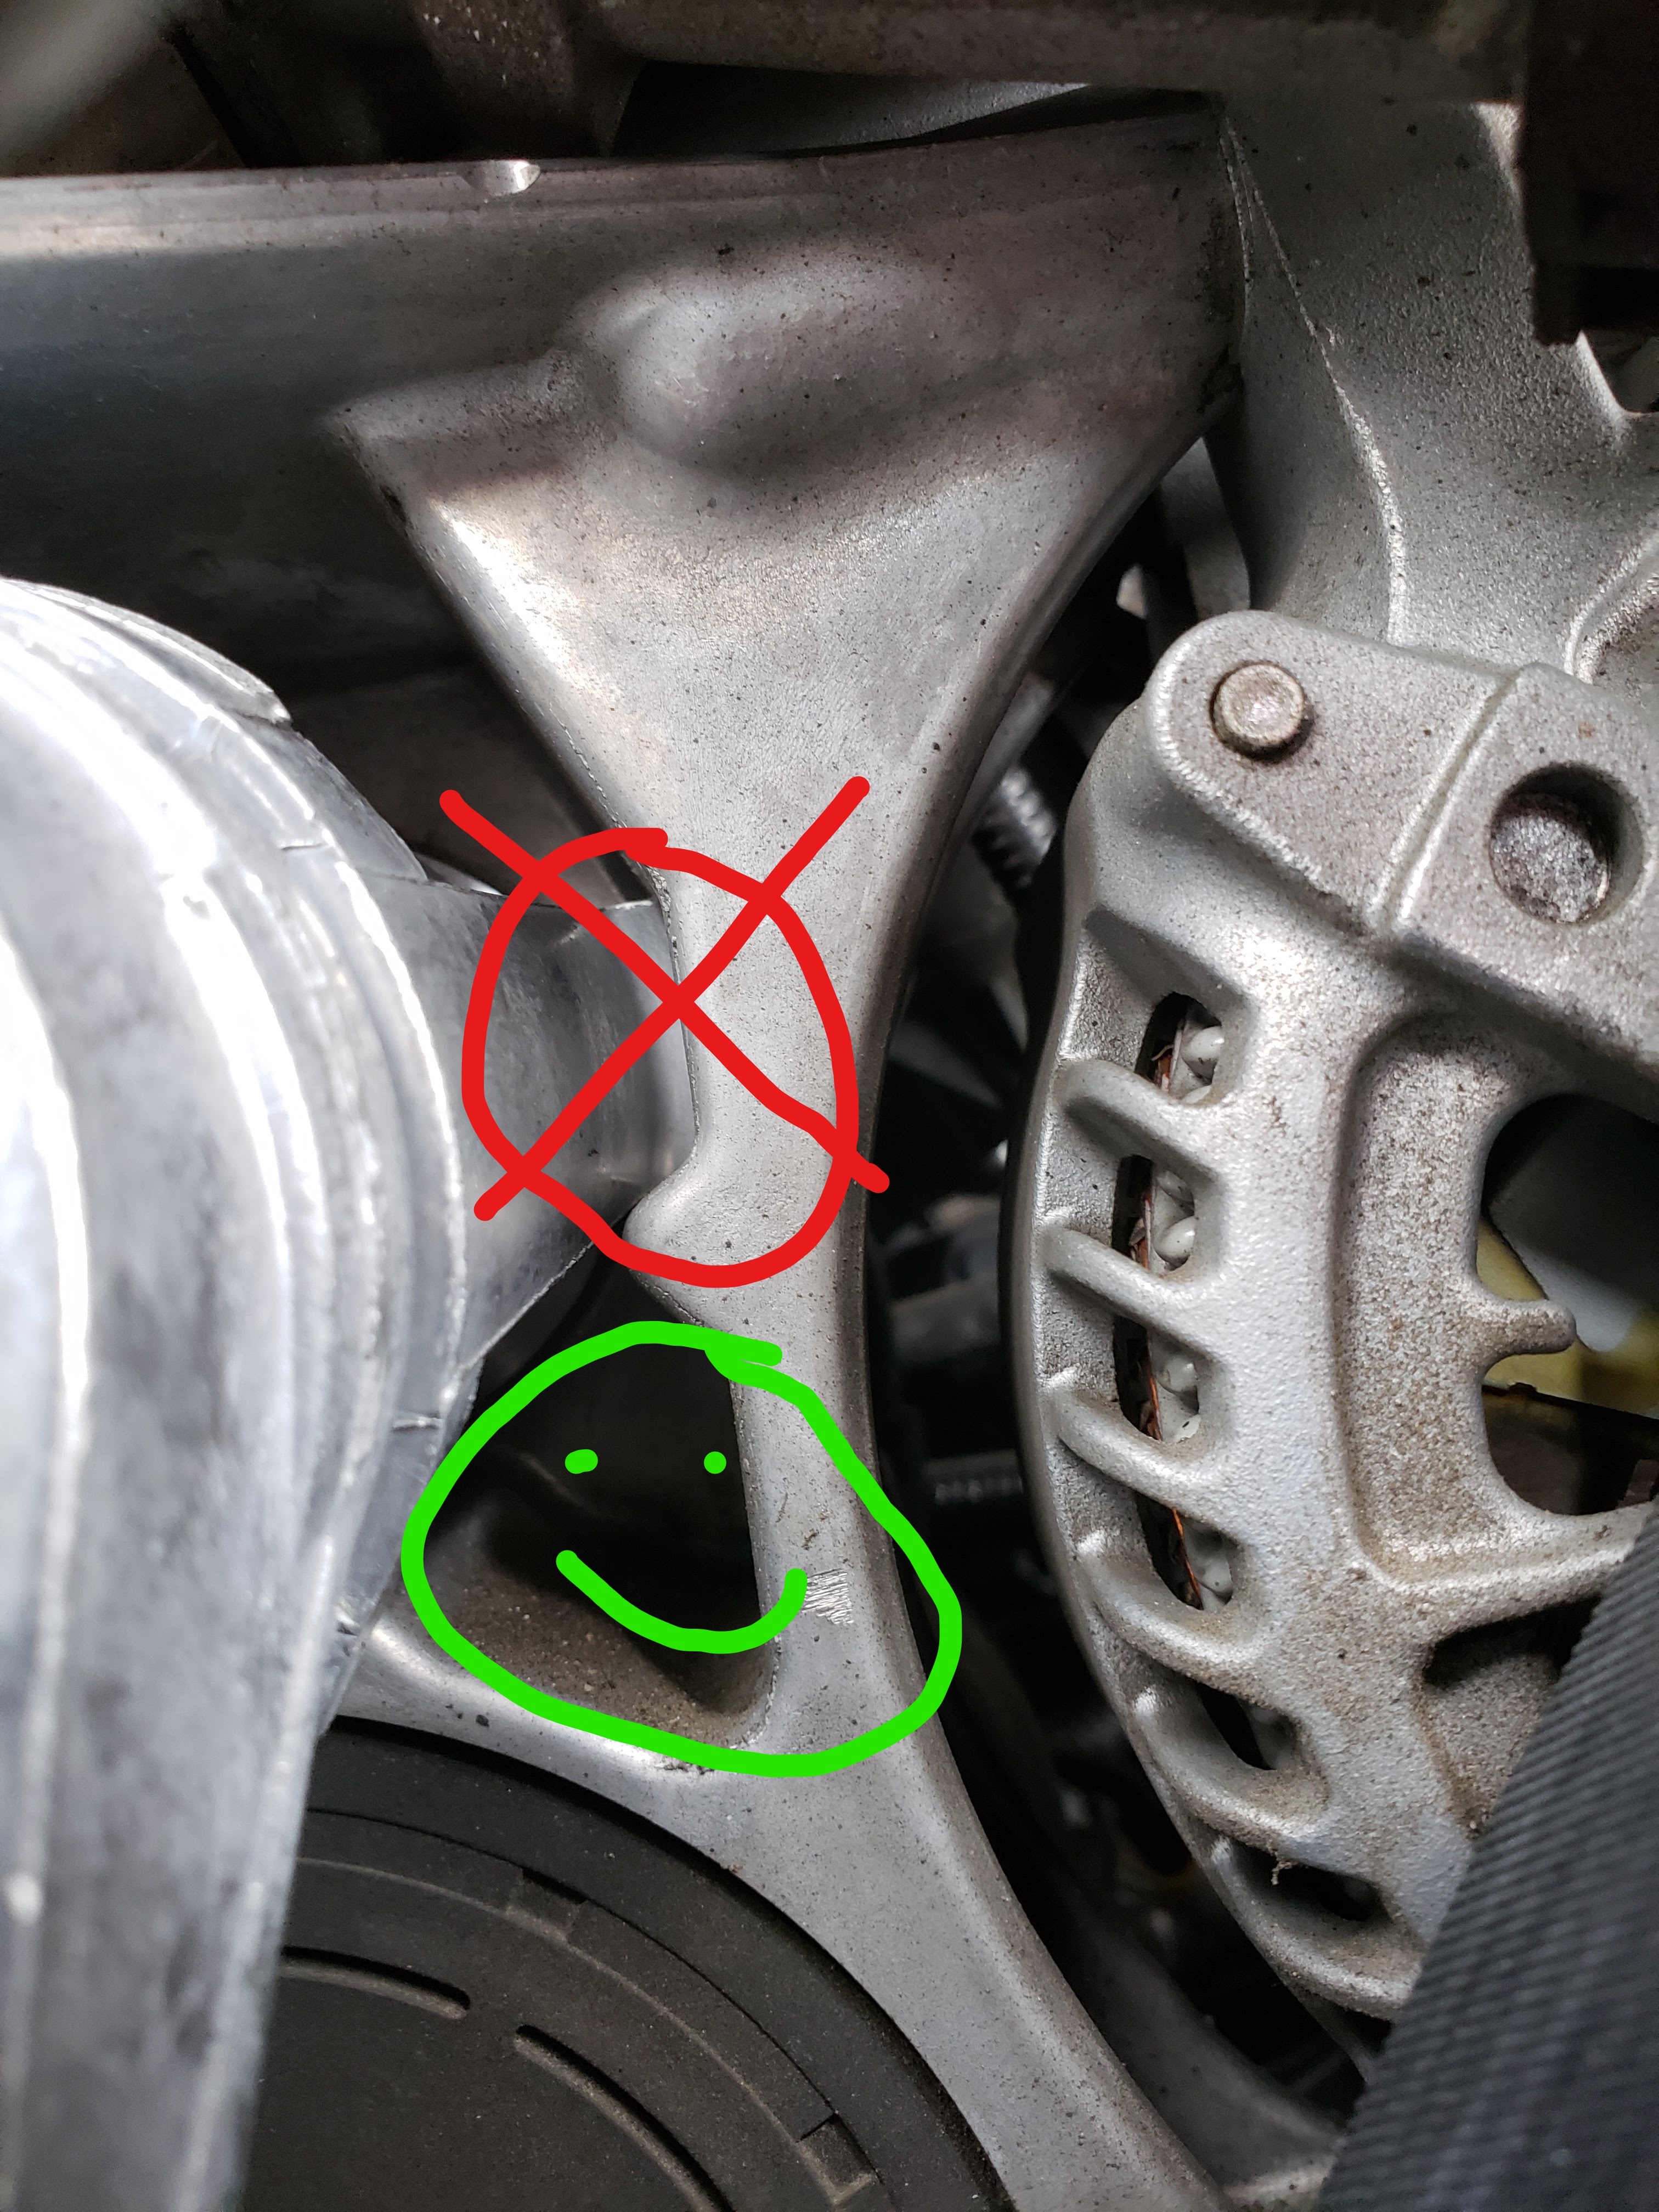
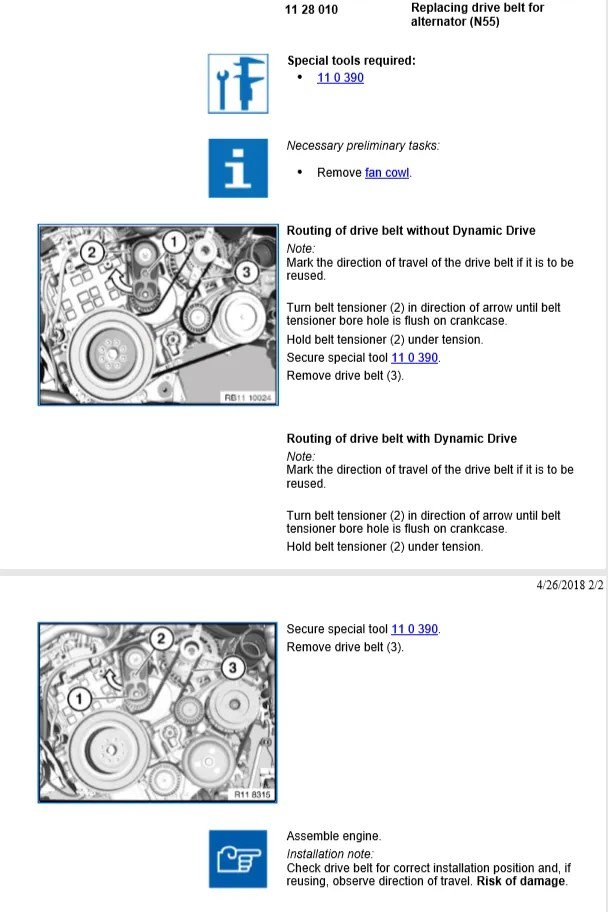
- Stick your T50 torx or 3/8″ (9mm or 10mm might work) Allen socket the labeled green arrow area and push to your right towards the alternator making the tensioner swing left, enough for the next step below to get your BMW Tool 5000© inserted as seen in the steps below

- Keeping tension, insert your own patented BMW Tool 5000© into the area circled in baby blue below, this will hold the tensioner off the belt for the next step


- Remove the belt
- The new tensioner will be mounted in this area. Make sure the lobe on the tensioner goes into the green circled channel below. Using your eTorx, install the new tensioner leaving the pin it comes with in place
- So about that breaker bar in the tools used section. I definitely installed it wrong the first time around and had to gently use the breaker bar to remove it.

DON’T DO THIS! That lobe is suppose to go in the green, NOT the red.
- So about that breaker bar in the tools used section. I definitely installed it wrong the first time around and had to gently use the breaker bar to remove it.
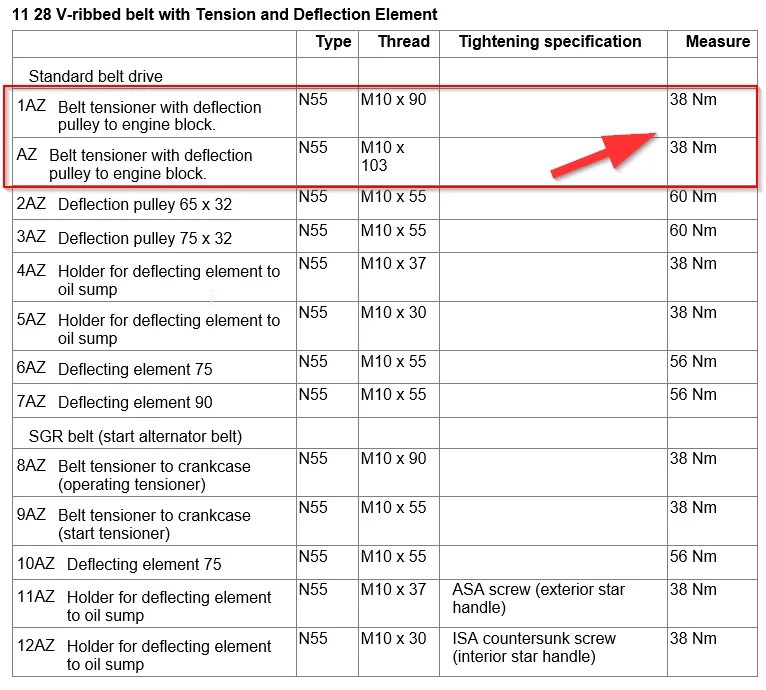
- Install the tensioner, torque value is: 38Nm or ~28ft/lbs.

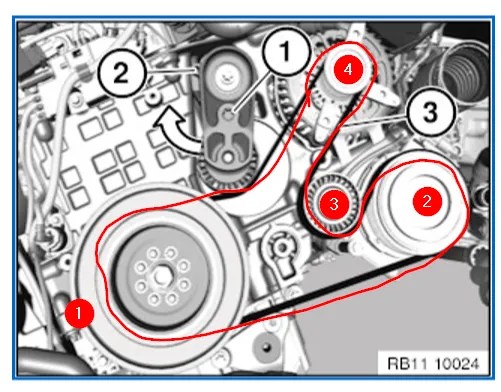
Straight from the horses mouth, ISTA - Snake your new belt around the crank first and then however works for you. For me it was crank first, waterpump, idler and then alternator.

- Like in step 3 put tension on the tensioner to you can remove the pin pictured below
- This little sucker was in there pretty good, takes a good amount of force.

- This little sucker was in there pretty good, takes a good amount of force.
- Start it up, make sure the belt is routing correctly and you’re good to go!
- Create a BMW Tool 110390 and name it something cool, I used a thick nail, with the pointy head snipped off, with some random string from one of my kids kite attached to it.
Lessons Learned (things I would have done different):
- Install the tensioner the right way the first time, dumb ass.
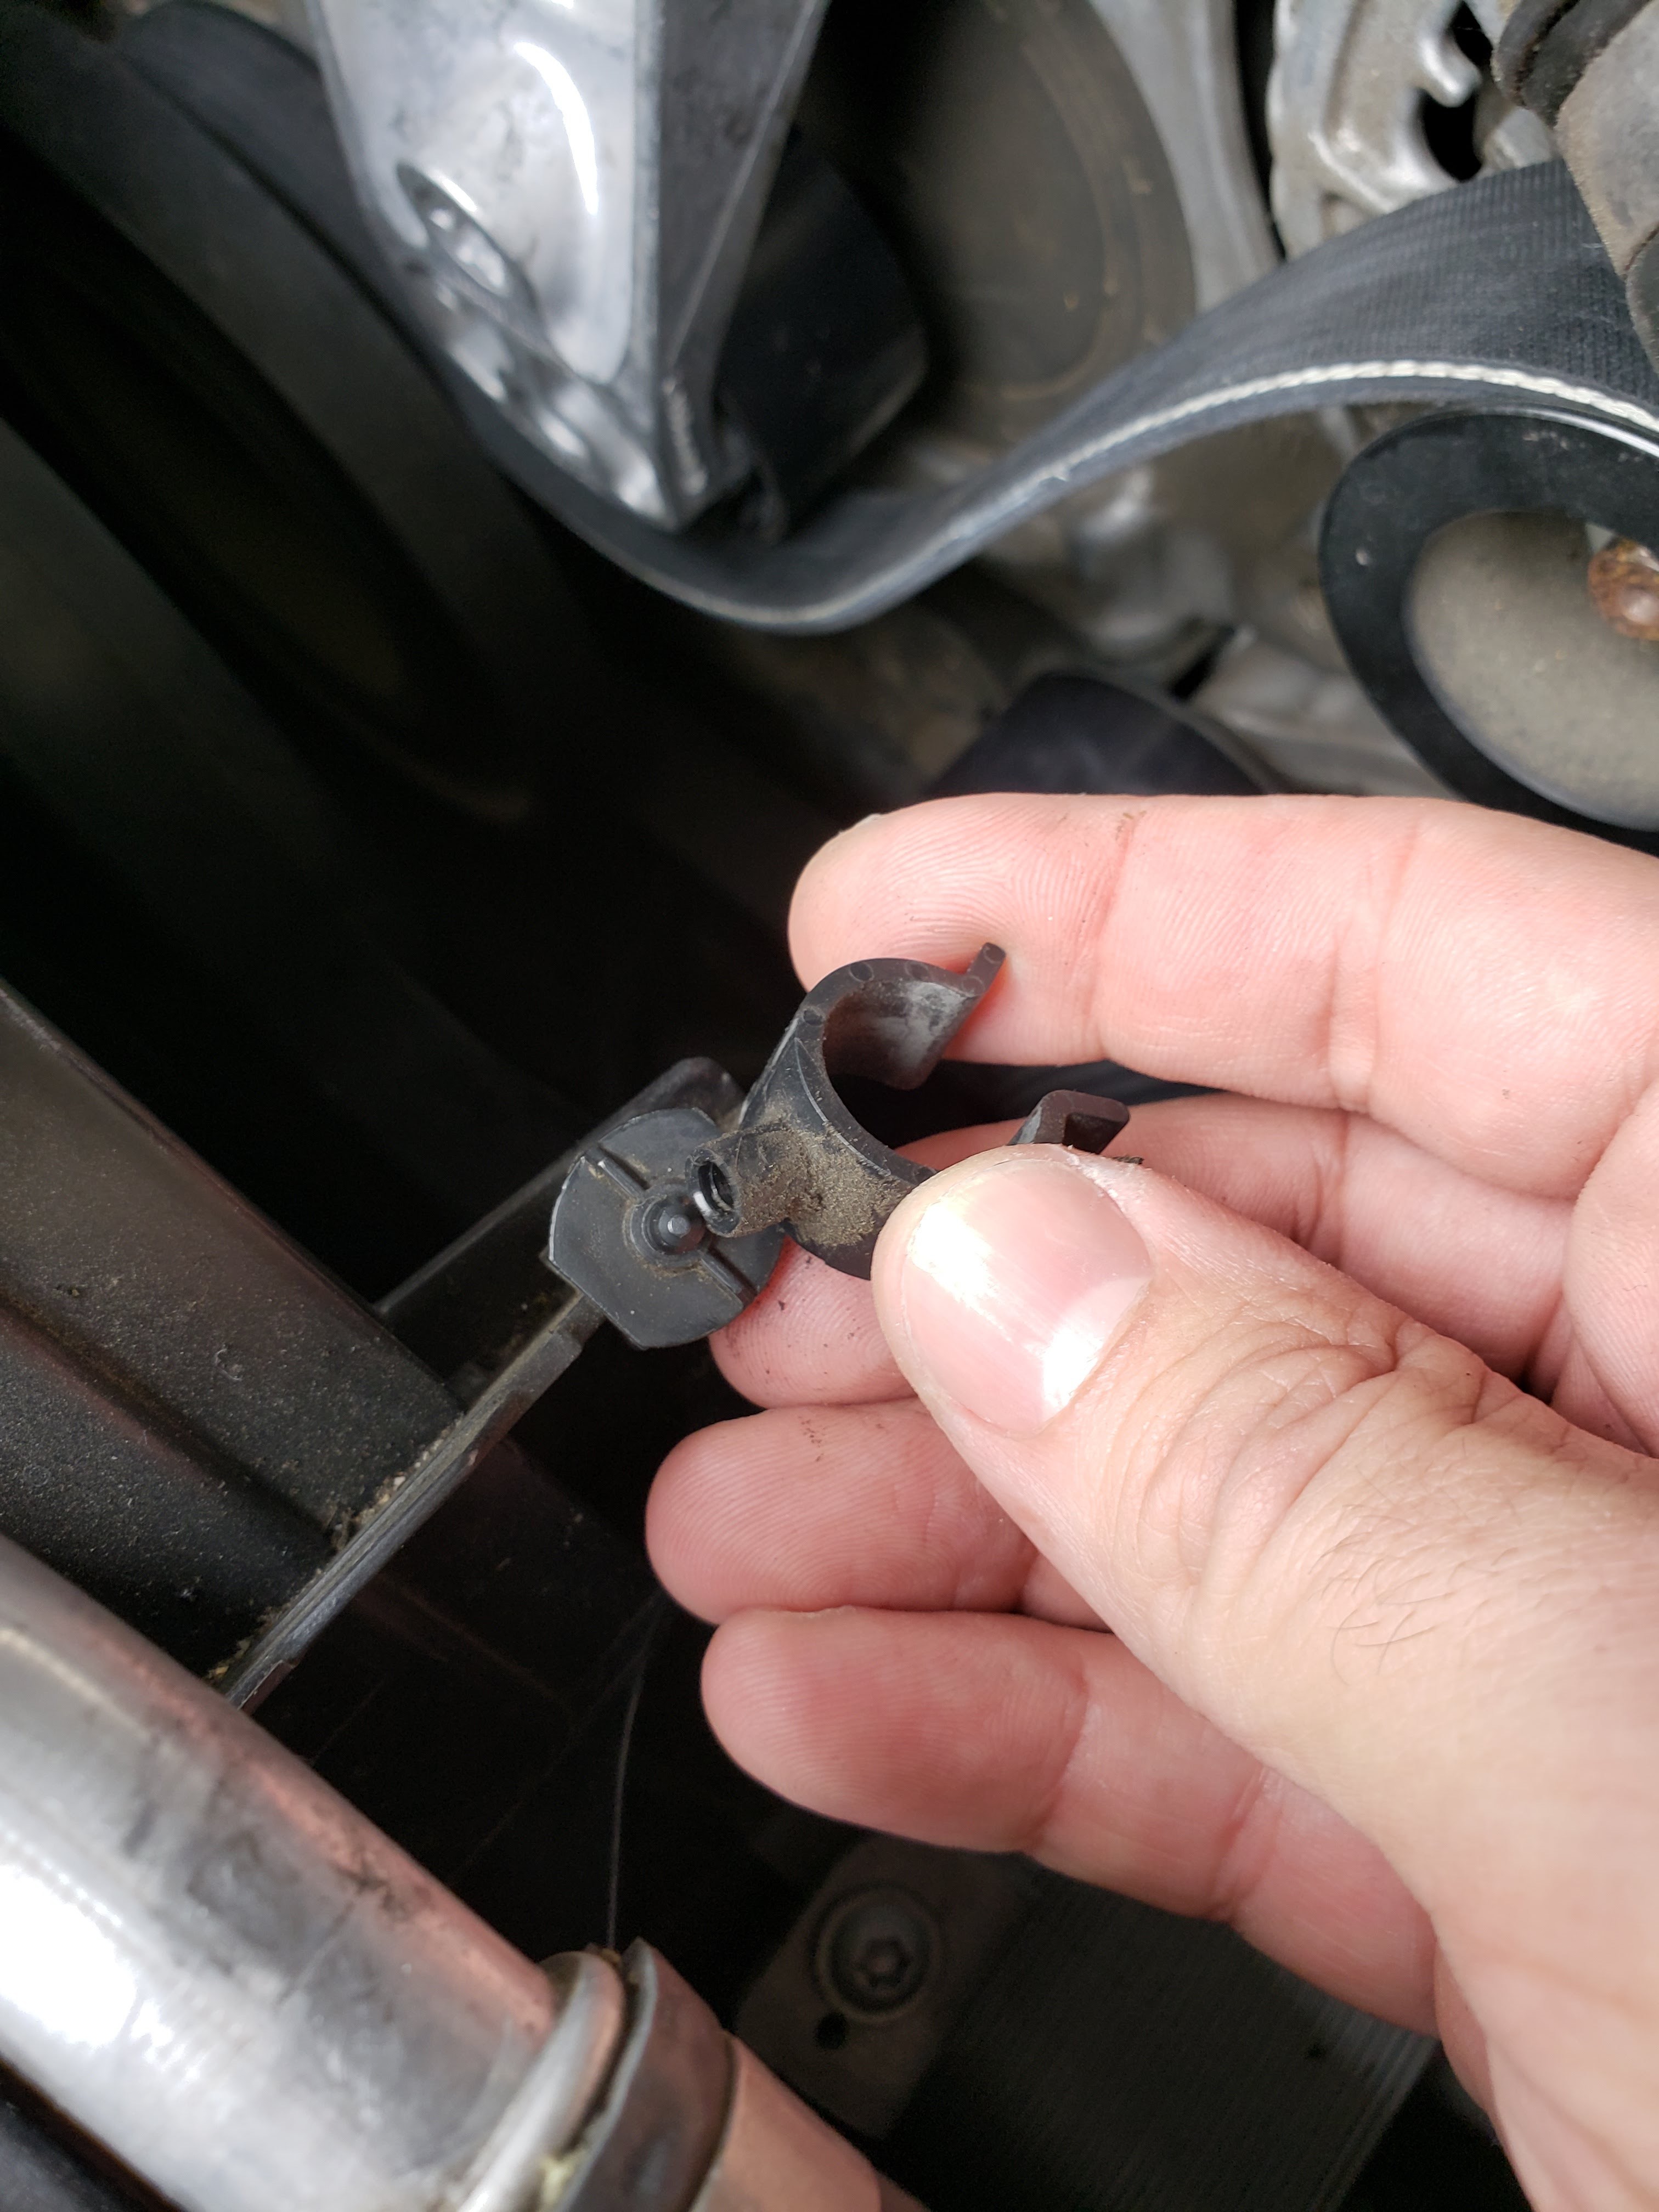
- The little clips holding in what I think is a coolant line (silver, rubber on each side) should be removed as seen below, one less thing to snag on to and break, just pull on them and they will separate

Results
Here’s a video of the new tensioner installed, no jiggle at all.

Reference:
Click for full size

Great job love the pics very informative information
Great work, I need to tackle this soon. Does the electric fan have to be removed?
Thanks Ray! No it can be done with the fan in place. It’s a really painless job, you should be able to get it done pretty quickly and easily.
Thanks for the write up! I’m a little skeeved out by that 60nm spec for the idler
To get a pin (nail) in the old tensioner and to get the pin out of the new one.. you put a T60 torques into the t60 recess in the tensioner arm and take off the tension by turning the whole unit. (with i fully tightened bolt in both cases)
great right up tho!.. my tensioner was moving like this, so I did it before pre problems.
Cheers, Reed