Foreward:
Ever have one of those projects where you get to that point of no return and say to yourself “do I just let the professionals handle this?” This one did that for me. I watched the few Youtube videos out there, looked at forum posts, etc on the topic and the general feeling I got was this one was this is going to be a major PITA. It was, I decided against using any video’s or forum posts and followed what ISTA says. To say ISTA is lacking in the nitty gritty details is giving it more credit than it deserves. Hopefully this will help fill in the areas that are lacking from other sources. In hindsight doing it again would still suck but it wasn’t too bad I guess.
This is all started when my coolant overflow line cracked. There’s a huge issue with these, the forums are full of people having them fail. If you haven’t replaced yours yet, I highly suggest you do. After replacing that and topping off the coolant I then got a check engine light with a code stating that the thermostat was “stuck open”
Full disclosure, the product links below are Amazon affiliate links, appreciate any support for the site I get through them.
Technical skill
Cost
Time commitment
PITA factor
Prerequisites:

Make sure you have the tools needed for the job.
- 6mm and 8mm nut drivers (Seriously, Wera 4Lyfe)
- Hook pick set (Any will do, I have the Channel Locks)
- Ratchet set with 6mm and 8mm sockets
- Socket extension bars (I needed 10″ with a 1/4″ ratchet)
- (Possibly needed) Socket Universal Joint
- T25 torx driver (I use the Bondhus T-Handles)
- Short or Stubby T25 driver is needed as well (I use the Neiko offset driver) with something similar to this for bits
- Fat head Philips and regular screw drivers (Thermostat reservoir bleeder and for if you drop the intercooler)
- 1 gallon of BMW Coolant
- A container to mix the coolant in
- A new Thermostat (BMW Part #11-53-7-598-865)
- Automotive Drain Pan
- Rags to wipe up the spilled coolant (I use Pig Mats)
- (Optional) Impact with socket adaptor for the belly pan screws
The Steps:
Before we get into the actual steps please read this first. I did this my own, very inexperienced way, slightly deviating from what ISTA says. I skipped some steps in ISTA as I found they weren’t necessary and also did things in a slightly different order. In short, I’m just some dude who enjoys fixing stuff (and saving money) trying this on his own. Please take that into mind before following this guide.
ISTA has a list of “preliminary tasks” which include:
- Drain Coolant (I waited until I got the fan cowl out and was sure I could get to the thermostat before doing this)
- Remove Fan Cowl (f*** you fan cowl)
- Remove Front underbody protection (you know this, remove all 69 belly pan bolts)
- Place collecting vessel for coolant under engine compartment
I used my impact with a 8mm socket to remove the belly pan, then tackled removing the fan cowl so lets start with the fan cowl.
Fan Cowl removal:
This part sucked, like really really really sucked. This is where I was wondering if I should even keep going (and also the reason I didn’t drain the coolant until got this fan f***ker out. ISTA fails to mention some things that I’ll cover below. It appears people are doing it on Youtube without removing the cowl, I honestly have no idea how they do it, in my limited experience, it’s really tight in there.
- Remove the air intake tube on top of the engine bay (see here for a detailed look at how to do this, pretty straight forward)
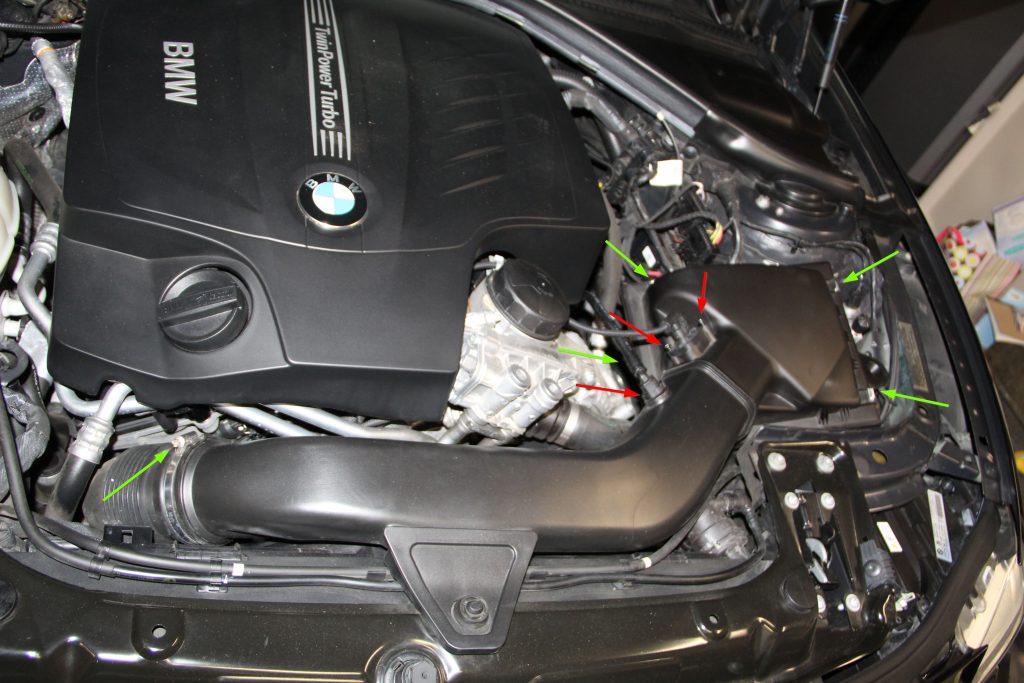
Stock intake removal, Red 1st, Green 2nd - Stuff a clean rag in the motherf**ker of a flex intake tube
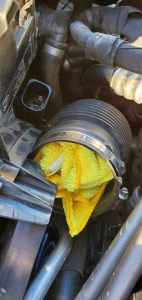
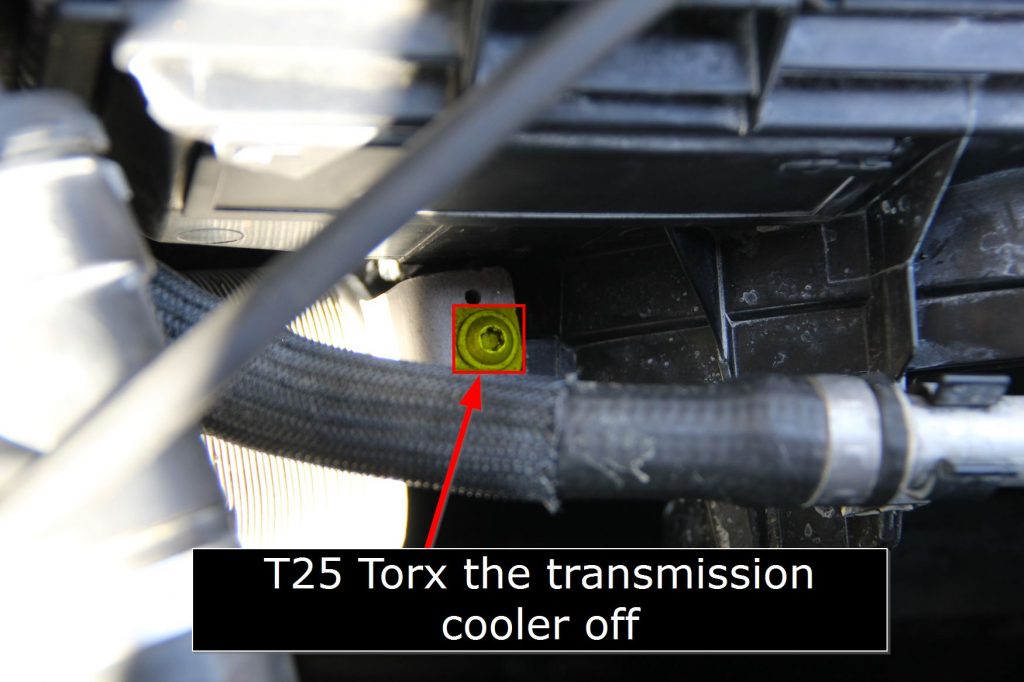
You will hate this flex tube, I guarantee it - (For Automatic Transmissions only) Use your Torx driver to unscrew the transmission oil cooler and just let it hang there for a bit
- Unclip the coolant line from the clips and move it to the side

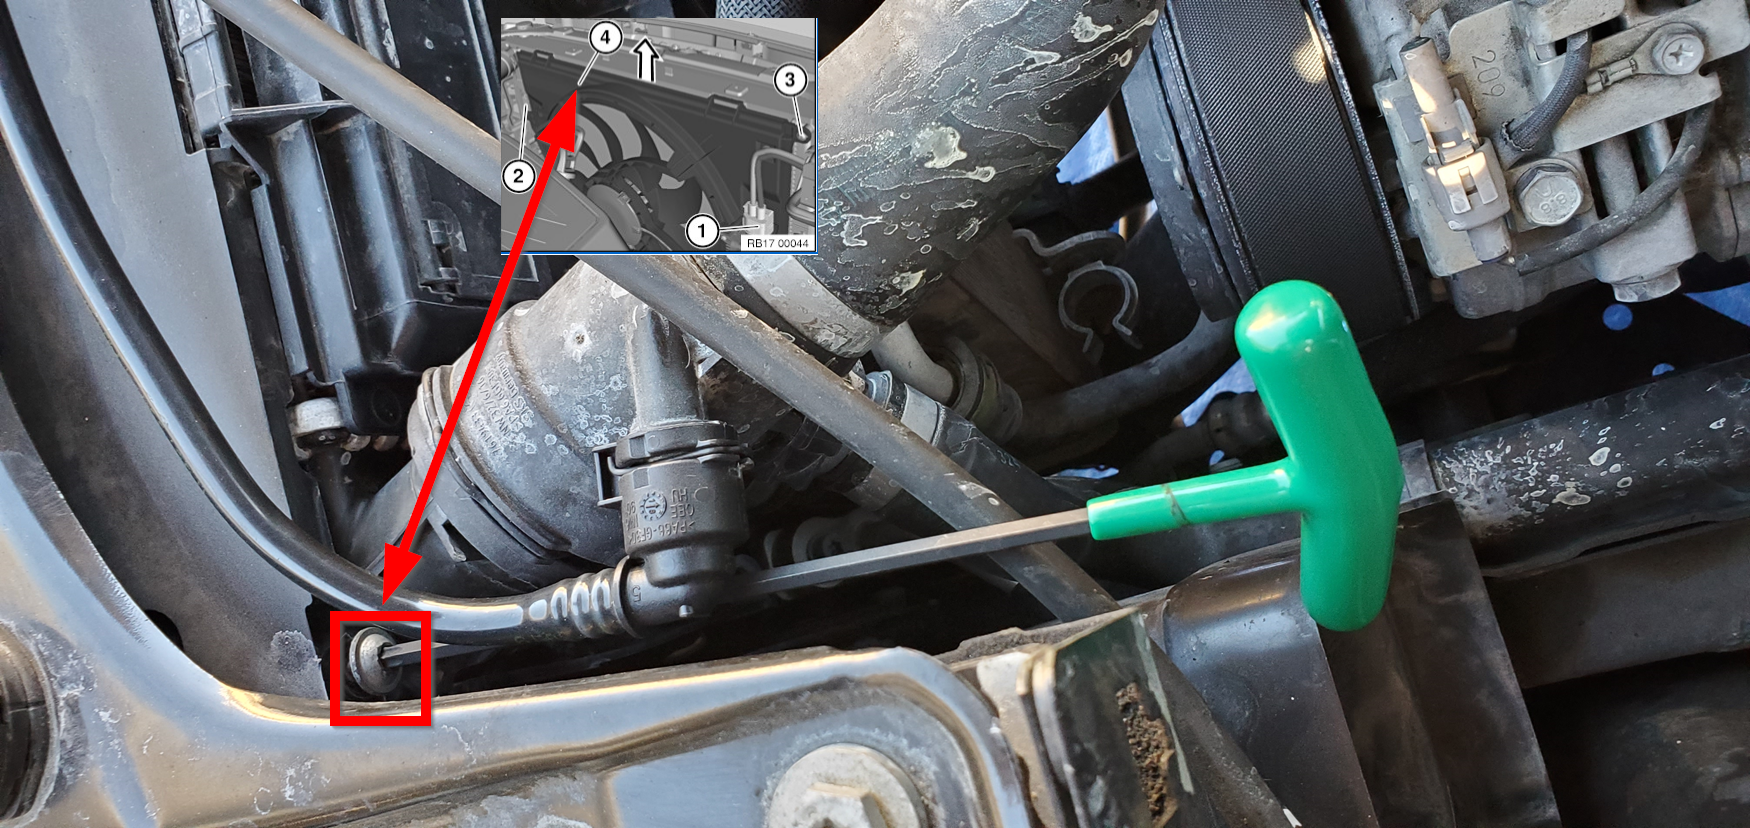
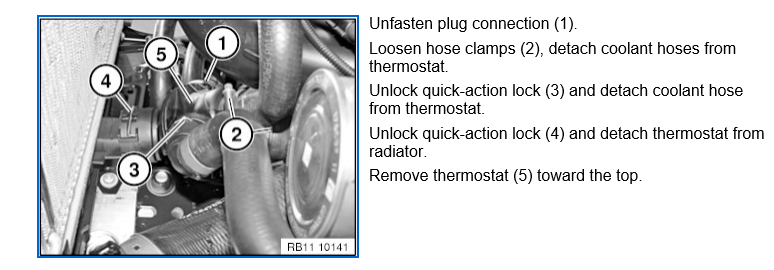
- Unscrew the 2 torx screws (labeled 3 & 4 below)

- Screw 3 gave me some trouble as my T-handle couldn’t fit in there to take it out. I just used this cheap ratchet adapter to a Torx 25 security bit to get it out
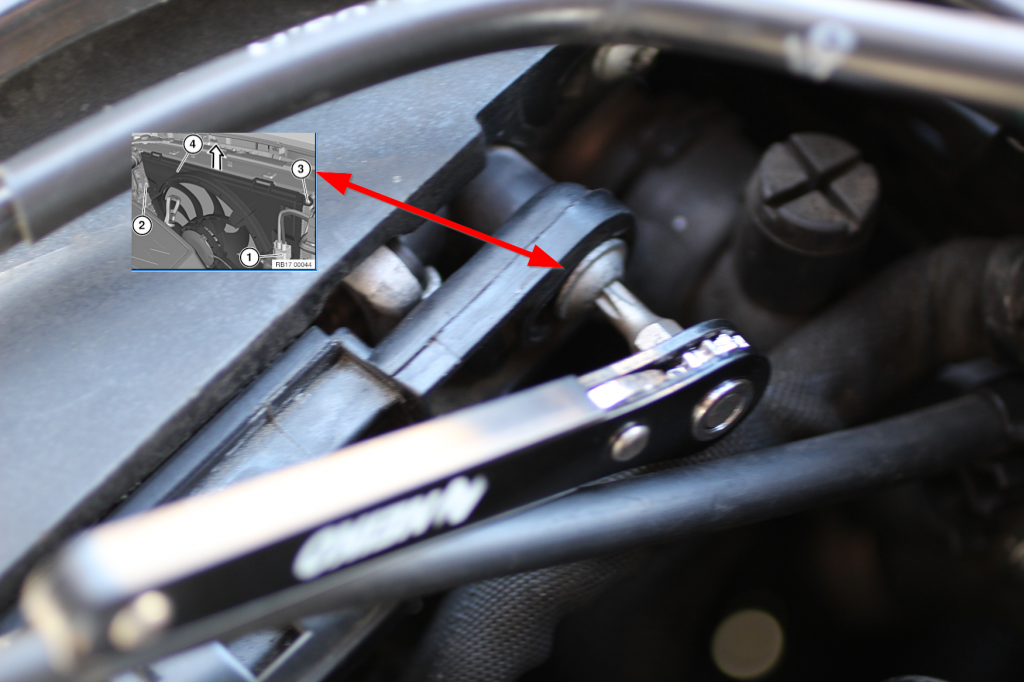
Screw 3 - Screw 4 is easy

Screw 4 - I left what’s labeled 1 below until later on as getting my hand in there to grasp the electrical connector just wasn’t happening thanks to the f***king flex tube
- As for 2 in the diagram, I had to get my neighbor to help me with that but it’s just a pull tab release thing so as you’re pulling up on the fan cowl you need to pull out on that tab
- Now we get to the part where I questioned if I should be doing this. I still haven’t drained the coolant as I wanted to make sure I could get this out of the way first.
- Contrary to what ISTA says the radiator would not pull straight up and out. There is a tab under the highlighted radiator tube below that will stop it from pulling straight up. (Red line is my awesome attempt at showing the fan cowl border and what’s going on behind the radiator hose)
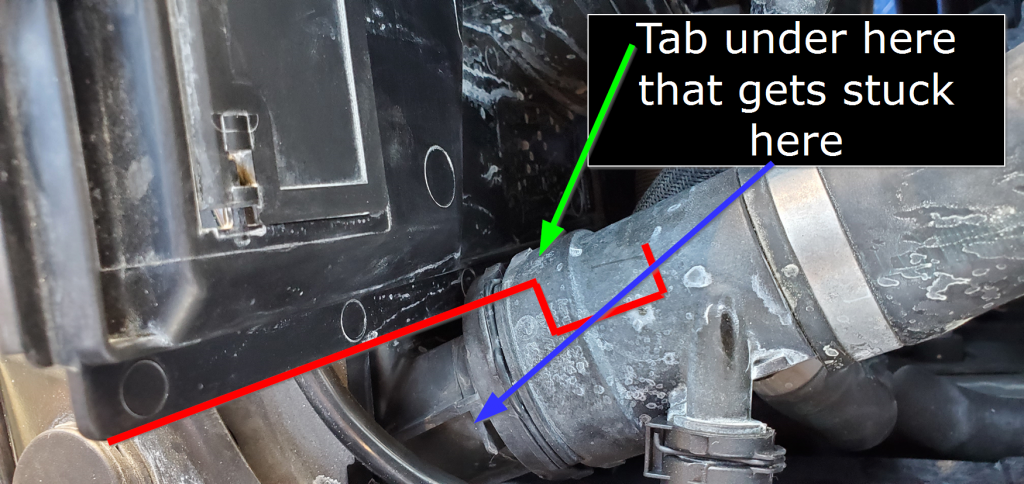
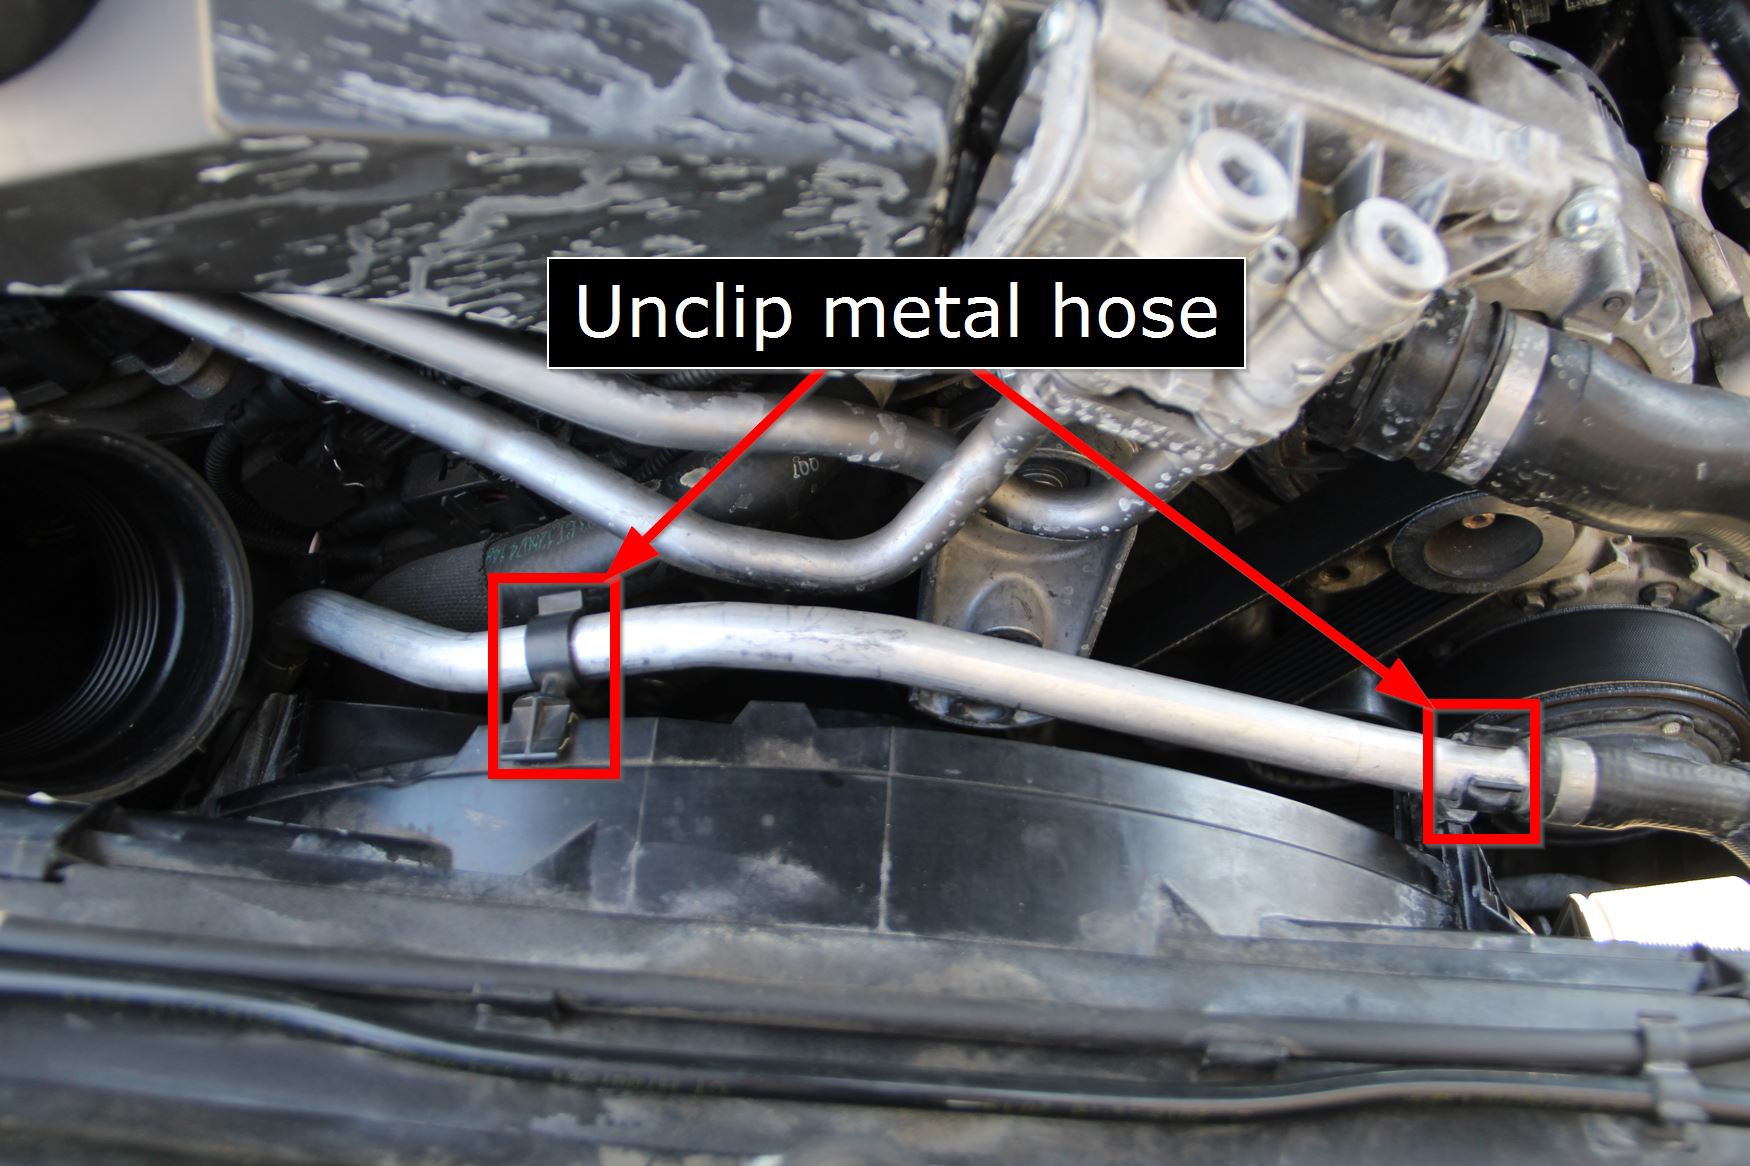
- Not only that these friggin’ metal tubes are all sorts of in the way, you’ll be moving 1 around quite a bit (it should be out of the plastic holders BTW)
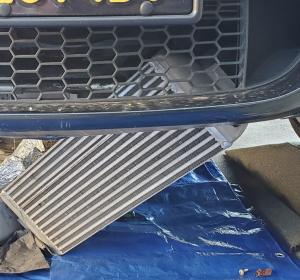
- After pushing, bending, squishing and trying everything I could do to get the fan cowl out, I ended up dropping one side of my intercool to get better clearance to pull it out. (See here for tips on easily getting the IC out)
- I eventually muscled the fan cowl out, getting what I think was pretty damn close to breaking the fan cowl. I got to the f*ck it point and just went for it
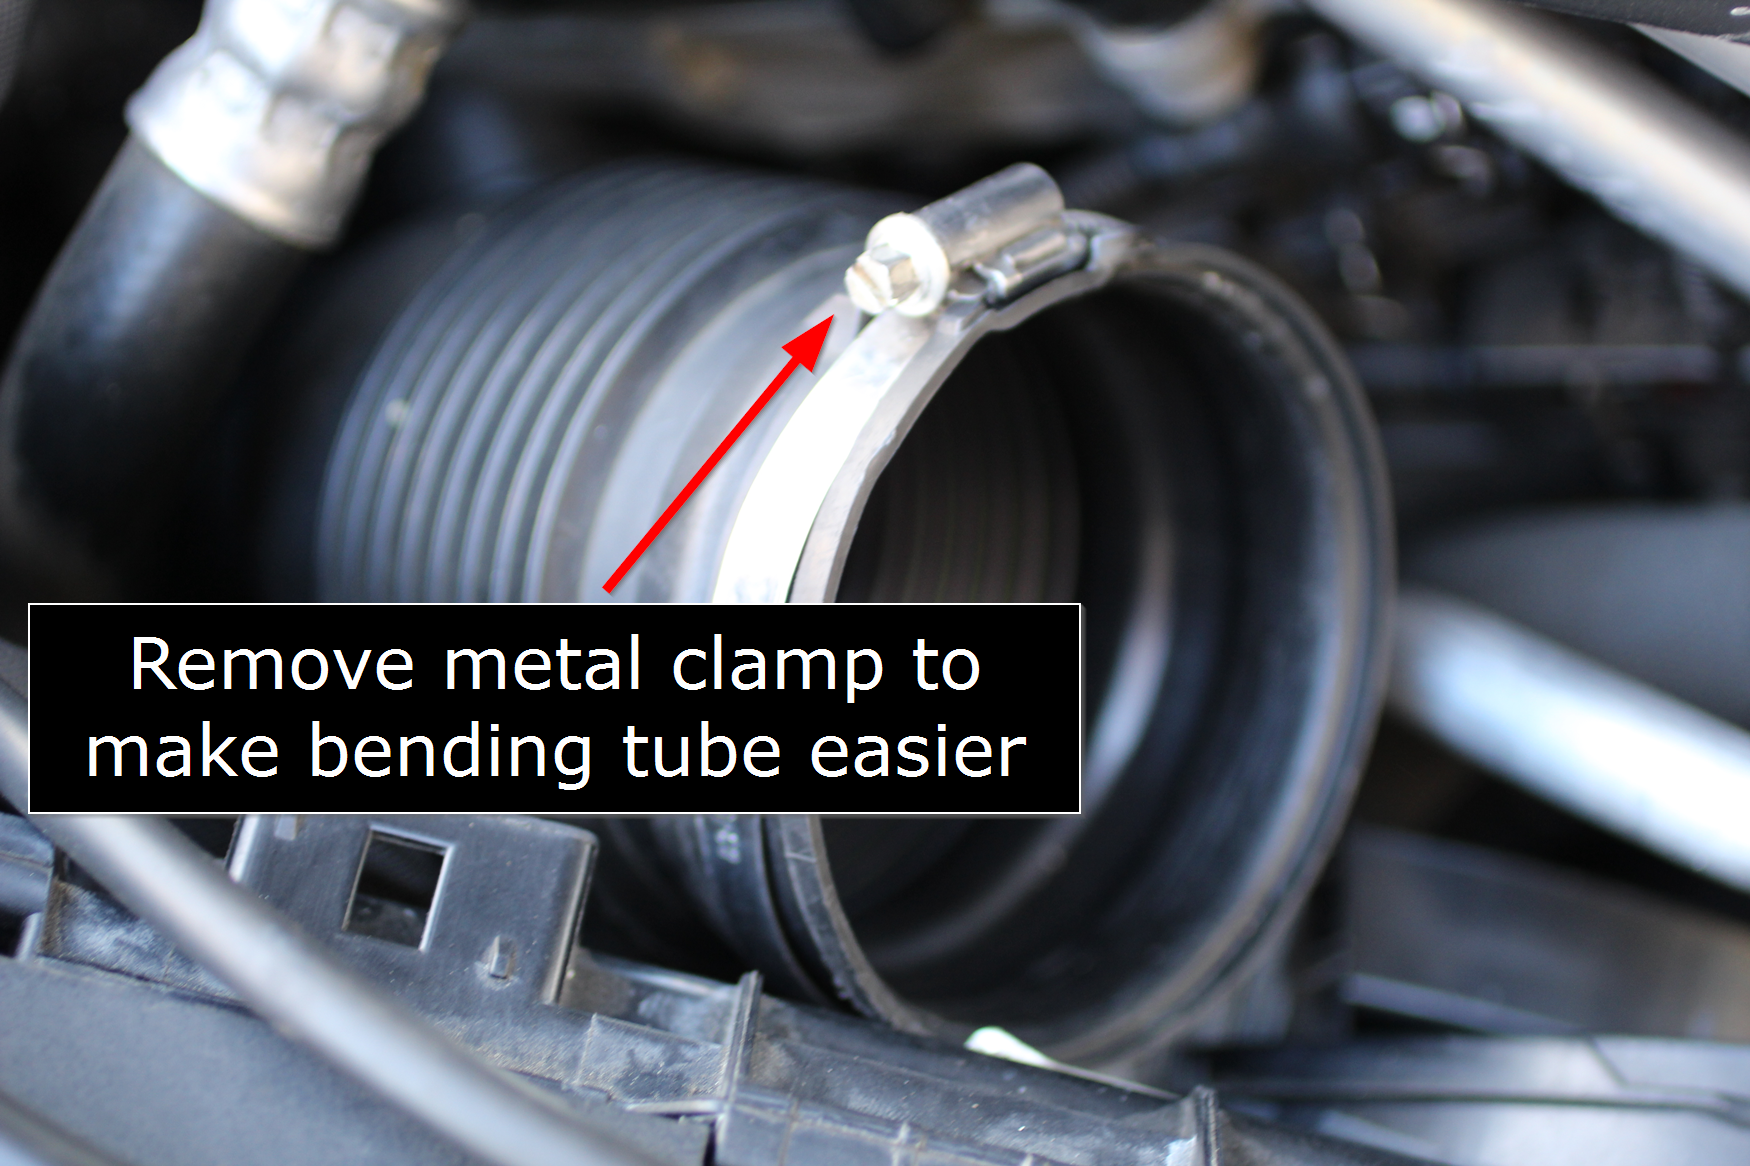
- I suggest removing the air intake clamp because I ended up having to bend the sh*t out of the intake tube to get the fan cowl both in and out

- I figured out that you can actually pull the radiator up to where the tab stops it and then push HARD to the left and it will slide over and come out a little easier. It still isn’t easy but the whole pushing to the right thing definitely made reinstallation way easier. Now I know for next time. Hopefully this saves you the struggle I went through
- Contrary to what ISTA says the radiator would not pull straight up and out. There is a tab under the highlighted radiator tube below that will stop it from pulling straight up. (Red line is my awesome attempt at showing the fan cowl border and what’s going on behind the radiator hose)
- Unplug the fan cowl electrical connector by squeezing the two sides.


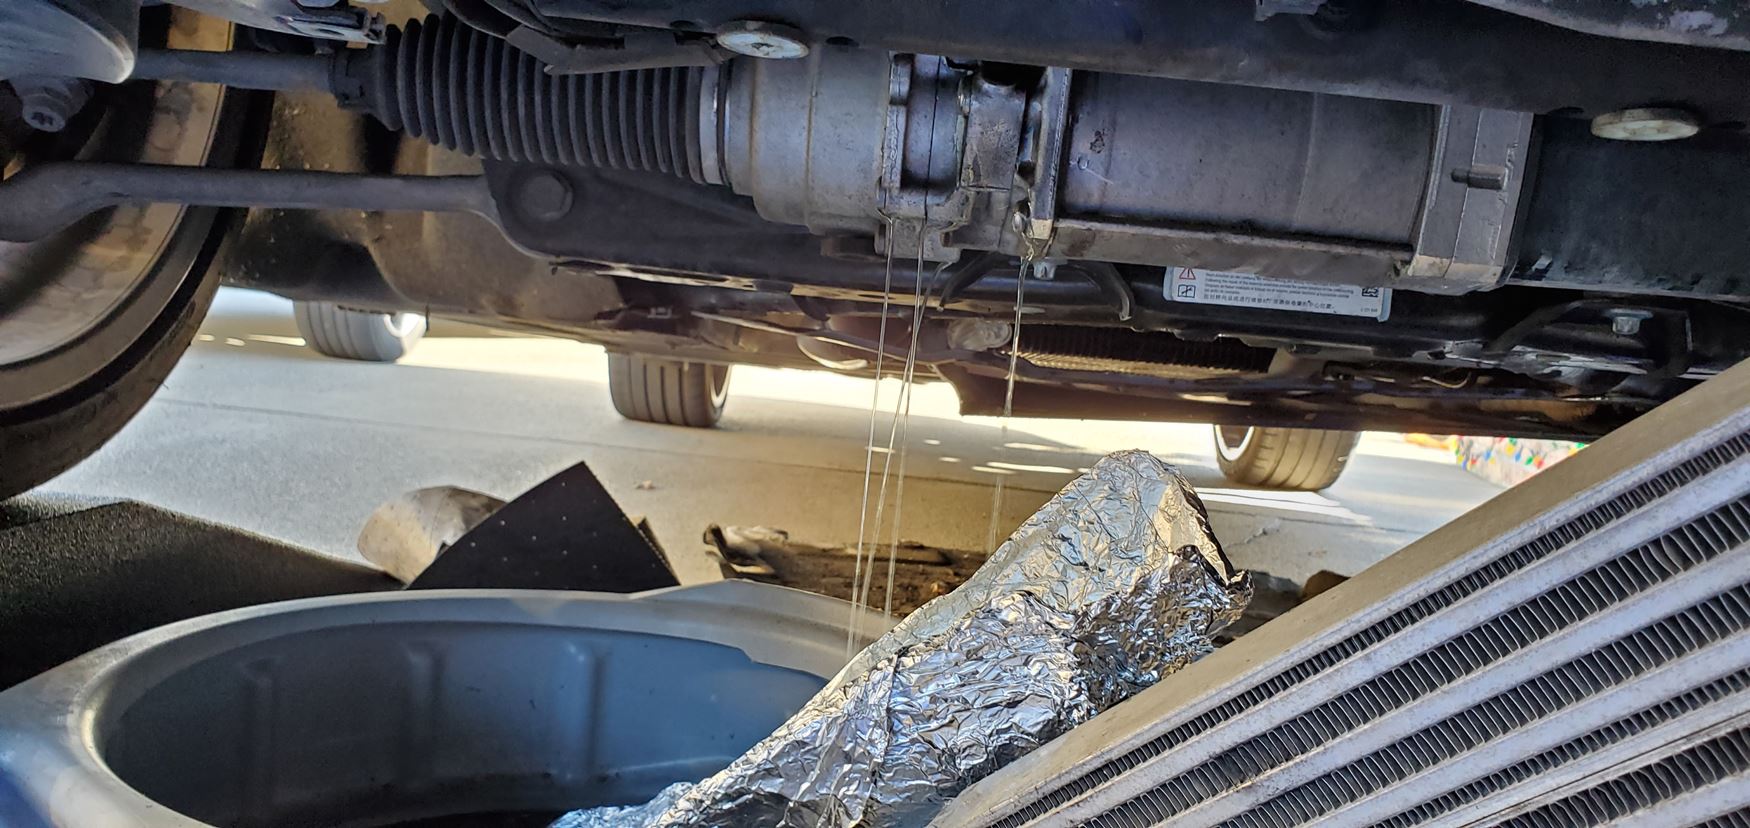
Draining coolant
At this point I had the air intake out, the fan cowl removed and the intercooler dropped on the passenger side. Get your fluid catching device ready, make a water chute if you so please to try and catch the avalanche of water, get rags ready to sop up the inevitable spill and get your 8mm nut driver and/or 8mm socket ready to unclamp the water pump hose.
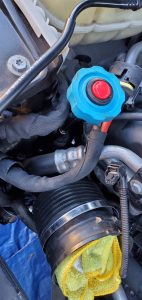
- ISTA says to “Release sealing cap on coolant expansion tank” first (under the hood, passenger side, beige tank)
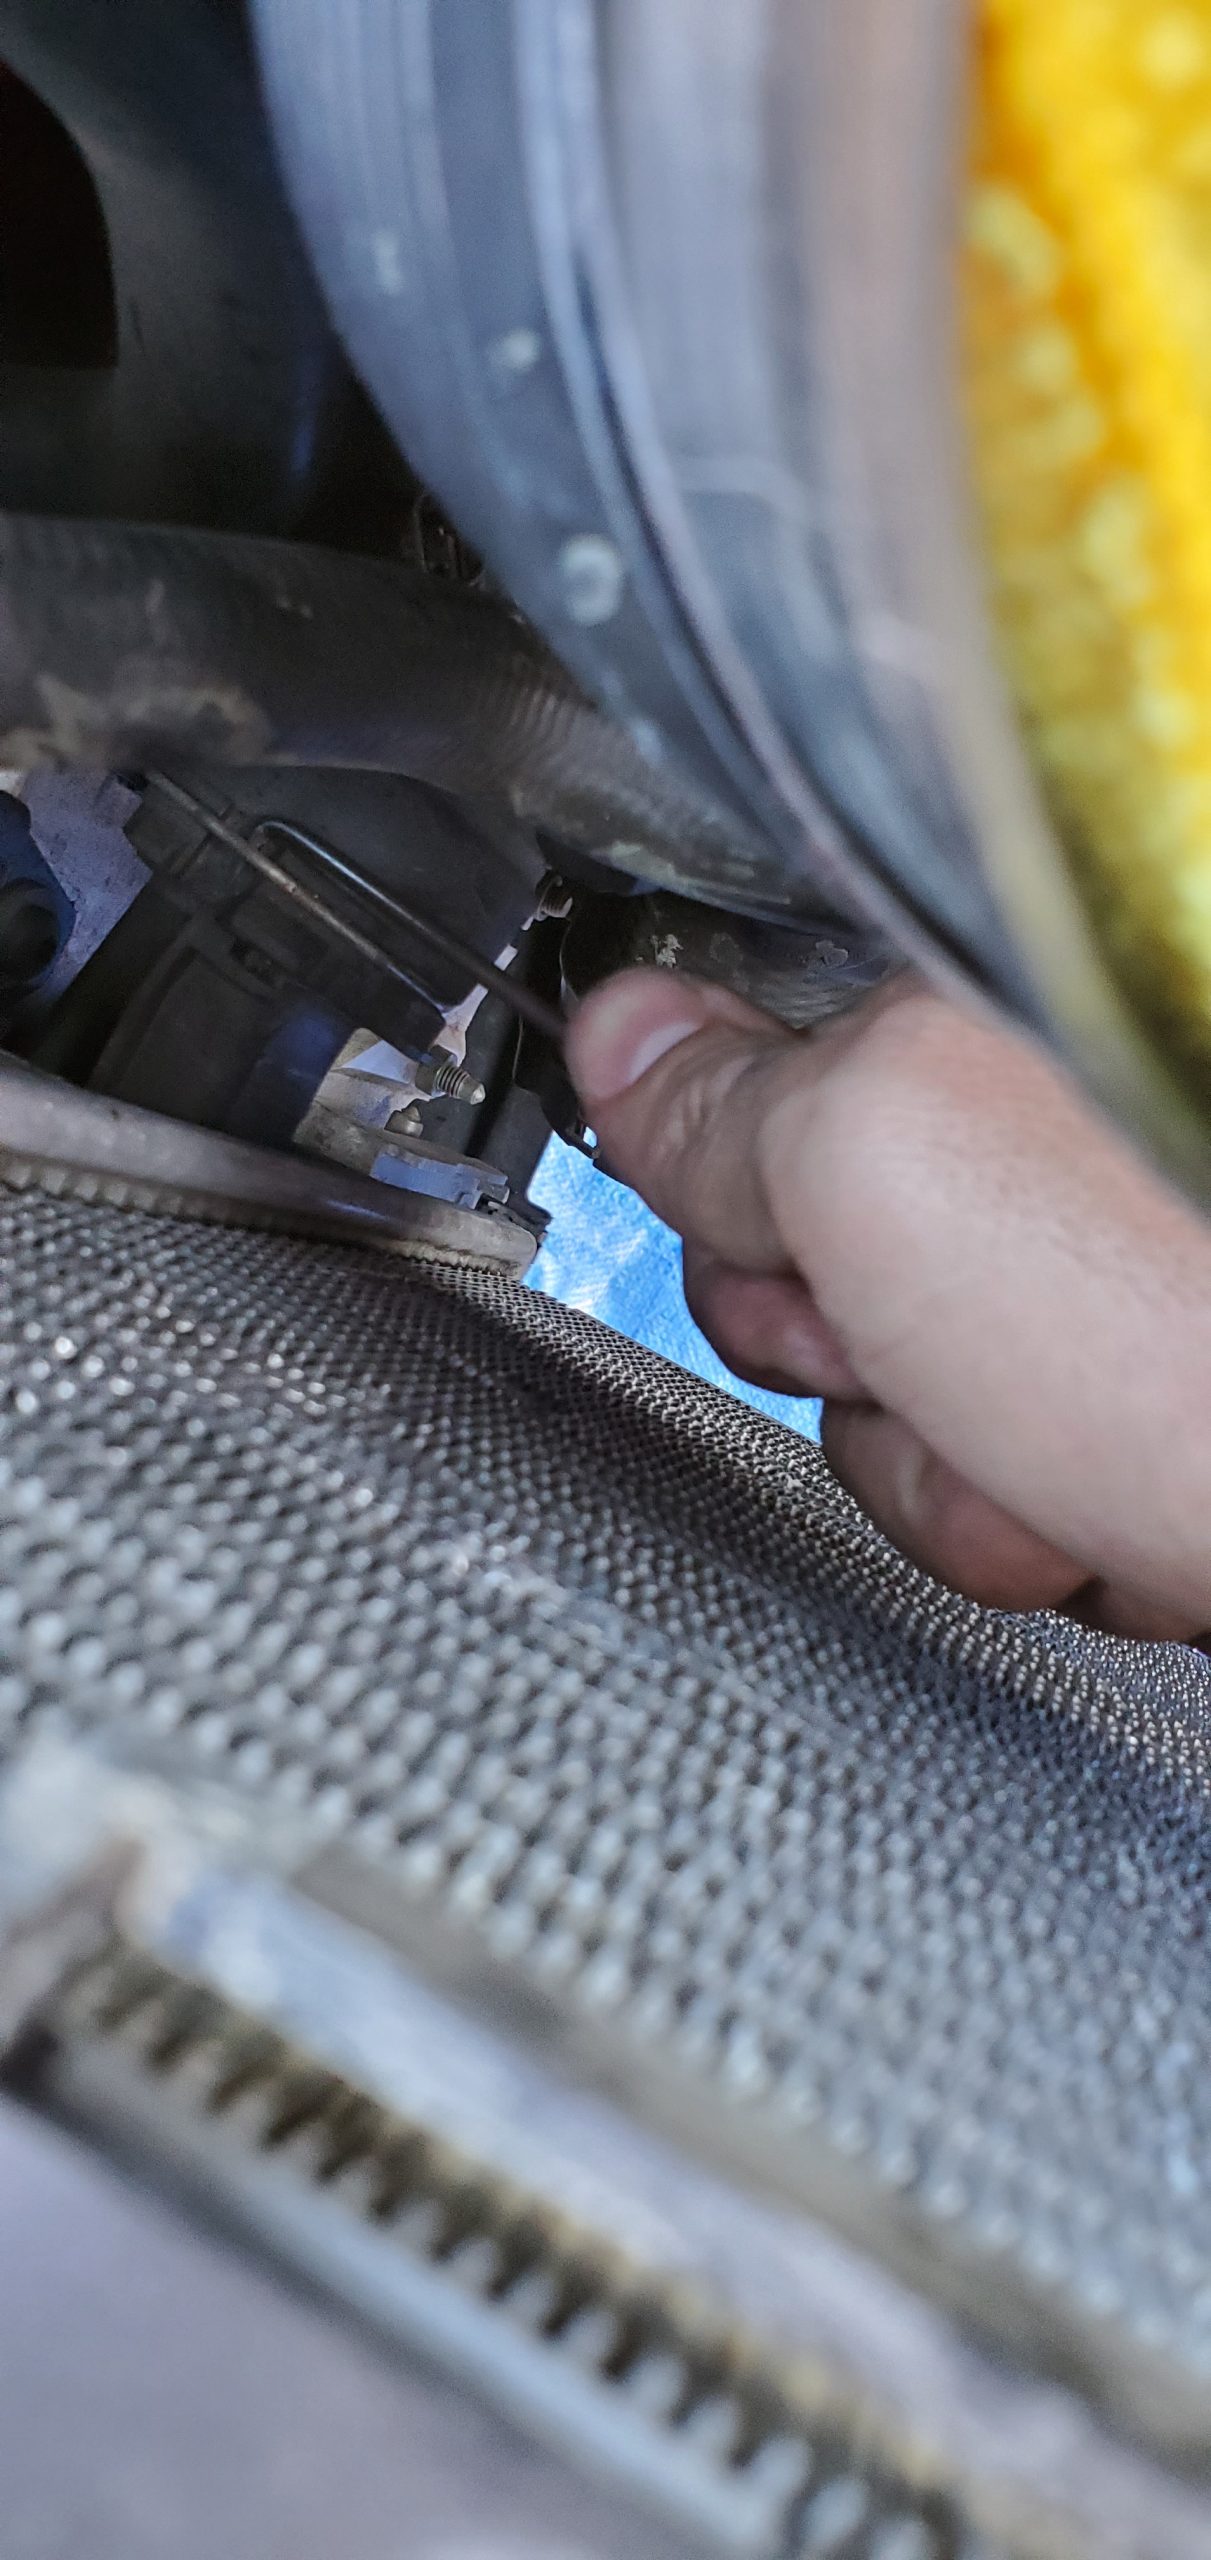
- Under the car, on the passenger side of the vehicle just next to/below the downpipe you will find your water pump. The water pump has 2 hoses connected to it with 8mm hose clamps.
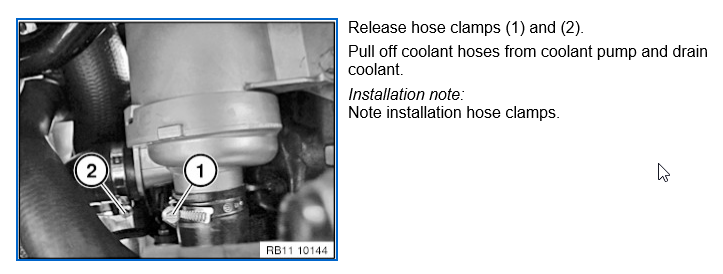
- I only removed hose number 2 as it was easier to access the clamp. It was difficult to get enough leverage to pull the tube off, having the intercooler down actually helped here. Pretty sure I reached around the strut to get enough leverage to wiggle and pull the hose off

- I left the water pump disconnected while I moved on to the next step
Thermostat removal
This wasn’t all that bad, it’s tight, some clamps were difficult to access but luckily not impossible. You have access from both the top and bottom of the engine bay and I think the difficulty might depend on how they were tightened in the first place from the factory.
- ISTA says to remove the coolant expansion tank. I couldn’t see any reason to do so… So I skipped that step.
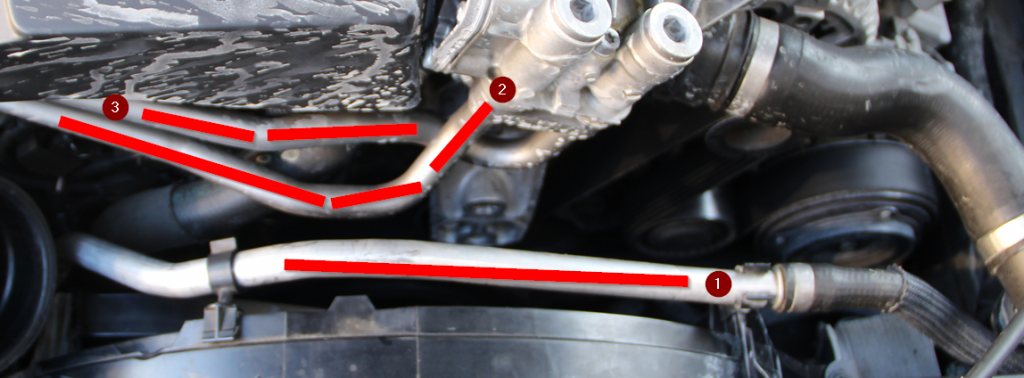
- Start working on removing the hoses. The quick action lock hoses (3 & 4) were easy. I was able to get them off with just a hook pick tool. It will probably work with a screwdriver or set of needlenose as well but the area is pretty tight.


It’s a little tight - Loosen the hose clamps labeled 2 above and work those off. Because of the angle one of mine was tightened at, I needed to use a 1/4″ triple extension bar (10″ total extension) with flex head adaptor on an 8mm nut socket combo to get it off. It was way to tight for a 3/8″ ratchet, to short for a nut driver, etc… Don’t forget you can access the hoses from both the top and bottom of the engine bay. Do whatever works to get them off
- If you’re looking at the thermostat top down, to remove the connection from the thermostat to the radiator and on the opposite side of that the thermostat to the water pump
- I removed the radiator side first by pulling it toward the rear of the car (towards the water pump,) The water pump side is flexible unlike the radiator side
- Once the radiator side of the thermostat was free I then angled the thermostat up to pull of the water pump side. The water pump hose connected to the thermostat can be accessed from under the car as well.
- Pull out the thermostat (mine came out from the top pretty easily and reverse your order to install everything again. ISTA suggests replacing all the coolant hoses. Mine appeared to be in great shape (and I didn’t order the parts) so I skipped it.


Reinstallation
This was way easier to be totally honest. I think it was both a gain in confidence and familiarity with this project that made it easier. Just some general notes about reinstallation here.
- Make sure when you put the fan cowl back in the little tabs on the bottom of fan cowl, under the car fit into the Intercooler indents for them
- Don’t forget to reinstall the air intake hose clamp
- The air intake tube sucks and I had to squish it A LOT to get the fan cowl back in (and out). Like I squished it so much I was afraid it was going to tear
- The aforementioned metal tubes are also a huge PITA but you can the moveable one up on top of the other ones to make them as flat as possible
Adding coolant and purging system
Did you know these cars have an automatic cooling system purge function?! Might be a common thing now-a-days but I thought that was pretty awesome.
I used a 50/50 mix of BMW (dealer) blue coolant with RO water from my kitchen filter in a 2 liter bottle. I roughly used 2 3/4 bottles (5.5 liters) of 50/50 mix.
ISTA says that most municipal tap water is fine to mix with your coolant, but I went with Reverse Osmosis water just because.
Here is exactly ISTA says about “coolant requirements”
Minimum requirements concerning water quality:
l Appearance: colourless, clear
l Sediment, without suspended matter
l pH value: 6.5-8.0
l Total hardness, max.: 20° dH (German hardness grade) or in new measuring unit:
l Total hardness, max.: 3.6 mmol Ca 2+/ltr.
l Chloride content: max. 100 mg/ltr.
l Sulphate content: max. 100 mg/ltr.
Potable tap water usually fulfils these requirements. Local water utilities can provide information about the quality of the water they supply. If necessary, the water must be treated (e.g. softened) or distilled water must be used.
The quality of regenerated sea water (as found in the Gulf states) is inadequate!
1.0 Requirements made of engine coolant Pure water is unsuitable as a coolant not just because of the lack of protection against freezing. Good functioning of the cooling system is only guaranteed once a suitable anti-freezing and anti-corrosive agent, or antifreeze for short, has been added. The cooling system of BMW vehicles must only be filled with the anti-freezing and anti-corrosive agents approved for this purpose. The filling and maintenance instructions to be found in the Repair Instructions and operating instructions must be observed. Antifreeze agents must meet the following requirements: To create these coolant properties, the anti-freezing and anti-corrosive agents must be mixed to the correct ratio with water. Prescribed mixture for coolant: The amounts of antifreeze required for providing protection against freezing-up are stated as percentage figures on the containers.
In terms of the actual procedure, ISTA wasn’t very clear here so I went to the forums. I followed this post by humbertob on bimmerpost in my own words below:
- Remove the black, plastic, large Philips head bleeding screw from the coolant reservoir and the big main cap
- Slowly fill the reservoir tank until coolant comes out of the bleeding screw hole
- Re-attach the bleeding screw and reservoir cap
- In the car, turn on the ignition (but don’t start the car)
- On your climate control, choose the hottest temperature and lowest fan speed
- Push the accelerator down to the floor and hold it there for about 10 seconds (your car should not be running)
- You should then hear the water pump turn on and bubbles get chopped up
- Let it run for 12-13 minutes
Couple things here, mine did not stop after 12-13 minutes and I kept hearing bubbles get sucked in a spread around. I stopped the purge cycle, opened the reservoir cap and added some more coolant in there and then after a 2nd purging cycle the bubbles noises started to go away.
Conclusion
Total time: ~4 hours (if I had to do it again it would be WAY less. There was a lot of stopping, staring and figuring out going on… and two kids too…)
Cost: $180 in parts

outstanding write up, dude! thanks a million; no doubt, my day will come for this..
Thanks Dan! Did you replace your overflow hose yet? If not, definitely do it ASAP. Not sure why that caused my t-stat to break (maybe lack of fluid or something, IDK) but that’s how it all started. And I’m just remembering as I type this…, At an Auto-X event last year, there was a guy in an E90 335i with the N55 and he was out for the day when the same coolant return line broke.
Awesome write-up! Thanks for sharing!
Hi, great video and description. I have the water pump out, safety glasses are a must. I’m working the fan now,
Everything is out, but the AT HX is hung up on a connector at the coolant manifold. Did you have this problem?
I have the 2013 335i M Sport SN F475490.
-Lawrence
Sorry Lawrence, just saw this now. I’m hoping you got it all figured out. How’d it go, did the fan give you as much trouble as it gave me?
It looks like this same approach can be used to replace the water pump in an F30 n55 with xdrive, correct?
I would assume so, but not sure if any of the xDrive stuff gets in the way though….
I have no idea how you took the fan cowl out. I’m at step 6 , removed all 3 torx screws, unclipped the cowl from the tab and the transmission cooler from the fan cowl, yet when I pull up, it raises only by about an inch or two. Something is holding the cowl on the driver side and it’s driving me crazy that I can’t identify what is holding it down.
I tried your method of pulling the cowl hard to the left (towards passenger side) to no avail. Does removing the intercooler like you did help ? wtf is this shit
I honestly don’t remember if pulling the intercooler down helped but I do remember how much it sucked getting the cowl out. Did you have any luck?
Thank you for this write up. Just changed out my thermostat and water pump (127k and other things are failing as well) and this saved my life. I don’t have the metal tube across the fan cowl, but 2 brittle plastic coolant lines, that I just ordered a new one because I broke it, but this was spot on. The fan cowl was definitely the worst. I ended up pulling up until the tab caught, then pulled on the passenger side up and out. Thank you again!!